Monday, August 27, 2007

Cool Pics


Everyone knows about hurricane, and tornado chasers. For months I have been trying to chase my bees to see where they are getting their pollen and nectar. I have a pretty good idea of where they have been going, but so far no place I can go. Tall Cabbage Palms and Saw Palmetto are not very easy places for a bee stalker like me.

A plant that last year I thought was a weed, and did my best to eradicate, gave me my best opportunity for seeing my bees for the 1st time away from the hive. Now all I have to do is try to find out how to best propagate it. Hyacinth bean


Hive inspection. Long Live the Queen!!!!!!!!!

Hate to sound so corny, but ……. Nature is a wonderful thing, and it knows what is doing. Not only did the hive manage to raise a new queen, but they seem to have raised a pretty good one. From the looks of it, she has been very busy laying for about 4 or 5 days. Exactly what Michael Bush’s Bee math page predicted.
The inspection was not easy, but I accomplished what I set out to do, which was to see if the hive had a new queen.

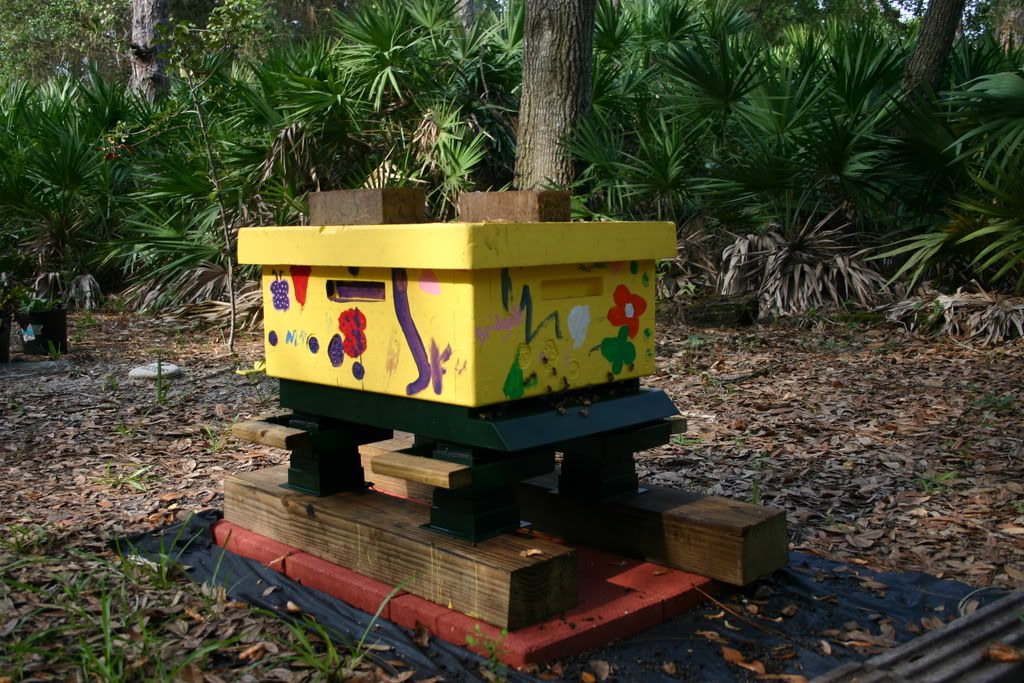
This is about the sixth time I have done a hive inspection. The previous times were of my original hive that I installed in late April. They grew to about five drawn out frames - a weak hive in everyone's book, but to me all those bees looked intimidating. Inspecting a hive that is about 75% of full strength (my best uneducated guess) was, I must admit, a little intimidating and quite the rush. Currently I’m reading Ross Conrad’s Natural Beekeeping – Organic Approaches to Modern Apiculture. The cover of the book has Mr Conrad wearing nothing but a baseball cap, kneeling over an open hive, and holding a full frame. In it he mentions how he rarely finds "it necessary to use a veil, let alone a bee suit”, “a well lit smoker, and a calm focused demeanor”is all he needs. I decided to be the young Jedi and feel the force. Few minutes later after further review while lighting the smoker I though …… OK No beekeeper gloves, just the veil. Sorry Mr. Conrad, I was just not feeling the force that strong.

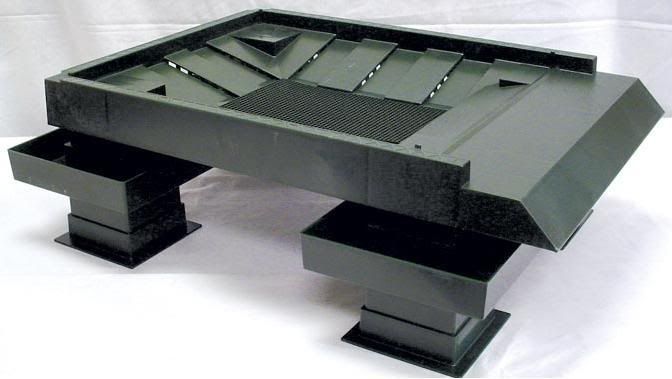
Since I don’t trust my eyesight to see important things, I set the camera up on one side of the hive on a tripod. As close as possible so every frame I pull out hangs over the hive. Don’t want to risk dropping the queen. Prying the top cover from a hive that hasn’t been opened in 24 days is no easy task, I’m learning to take my time and relax. Last thing I wanted to do was lift any of t
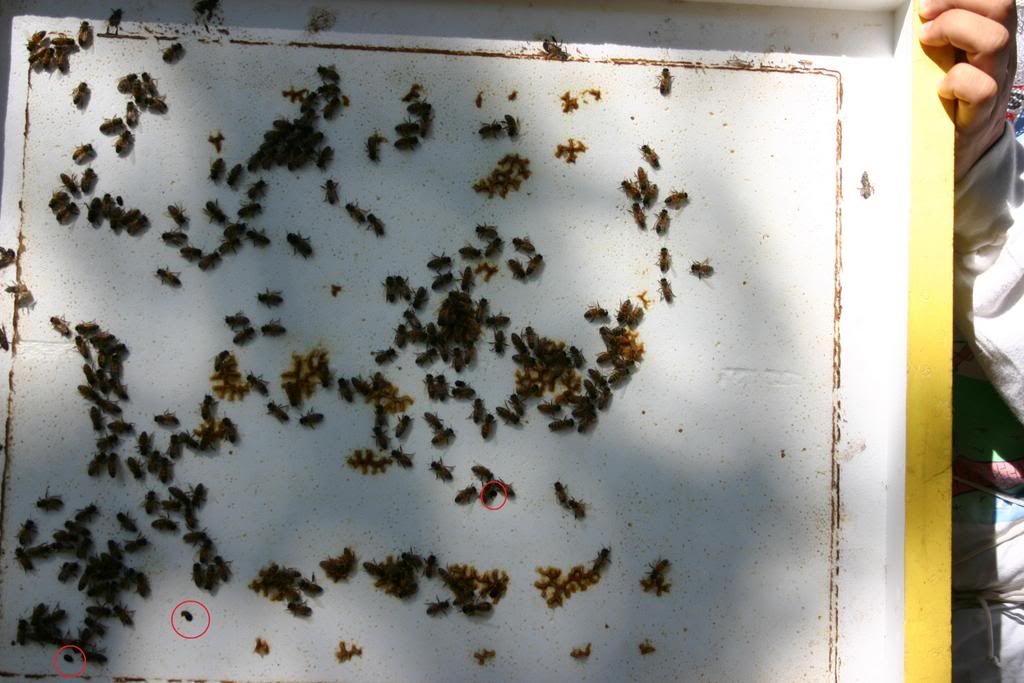
he frames out with the top cover, and make a lot of bees angry. I removed the cover by pushing it back and forth a few times with out lifting. I took a picture of it, as I mentioned before, I don’t trust that I will see important things. Please notice my finger on the top right, NO gloves, and a couple of Small hive beetles circled in red. I find it a lot easier to scrutinize every inch of those pictures later on.

Then I removed frame number 2, (or 9 depending on which side you are suppose to start counting). I purchased a local Beekeepers hive, and he was kind enough to put the frames in my hive body. Things looked good, the frames are not my original brand new purchased ones, and it seems from the color of the wax, that this foundation and wax is probably old. Color looks nothing like the color 
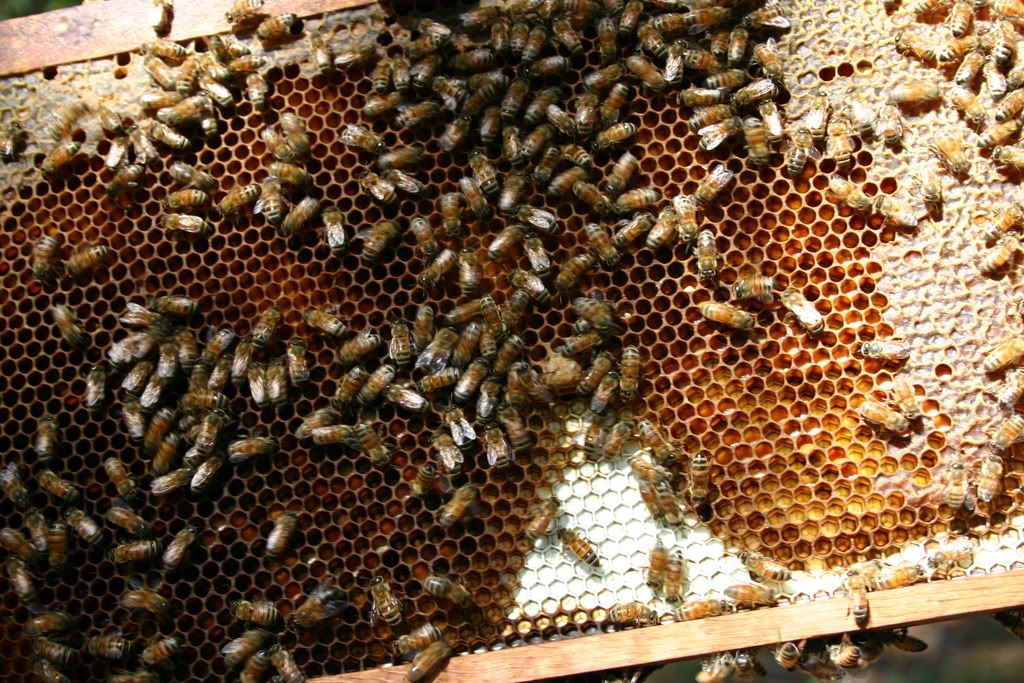
of the wax in my previous hive. Removing this frame was no easy task either; I need to get myself one of those one handed frame pullers. The frame slipped out of my fingers twice, luckily I was just trying to pull it out, so it was maybe ½ inch out of the hive body. Each time there was a loud BUZZ in return. Several bees came up, and after I smoked them, instead of going back down they took to flying around. The rest of the Jedi force, and cool calm demeanor went out the window. I stepped back, reloaded the smoker, and put on my gloves.
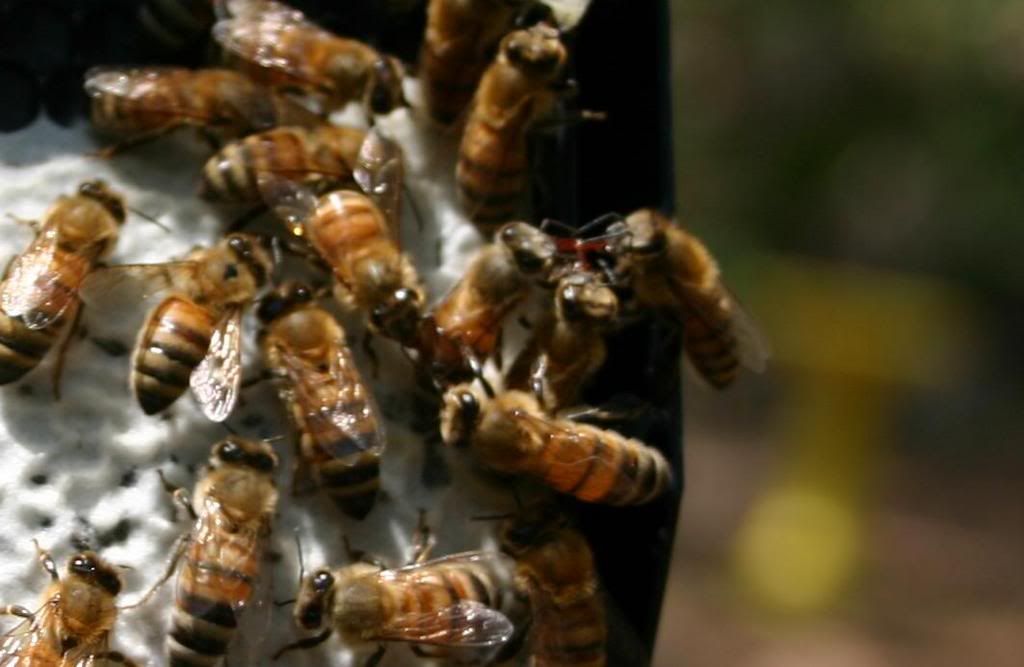
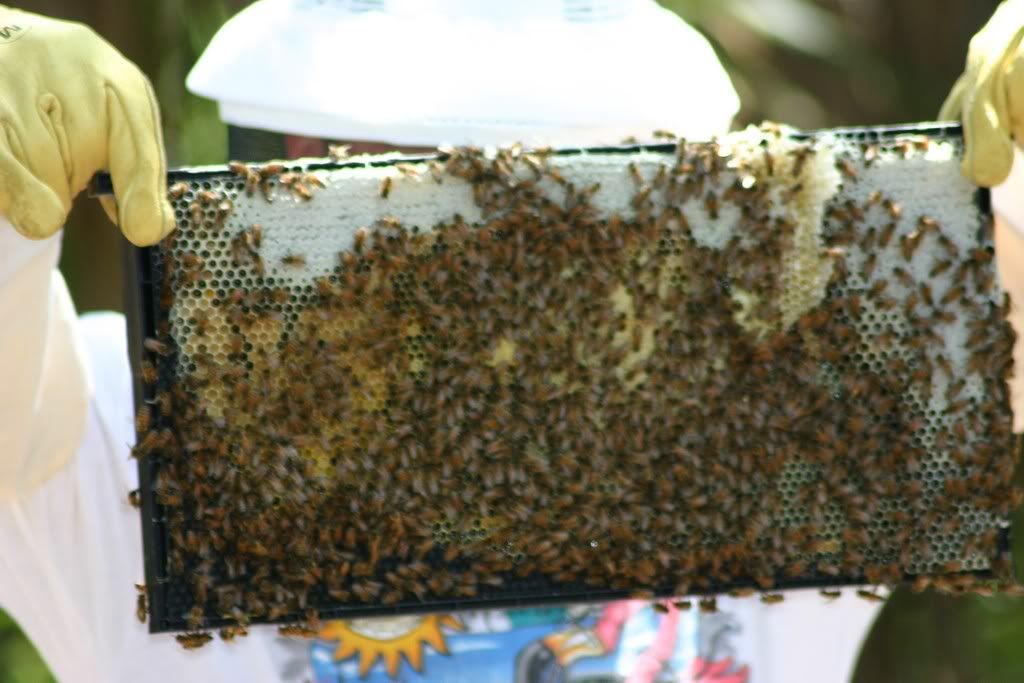
With frame 2 ou
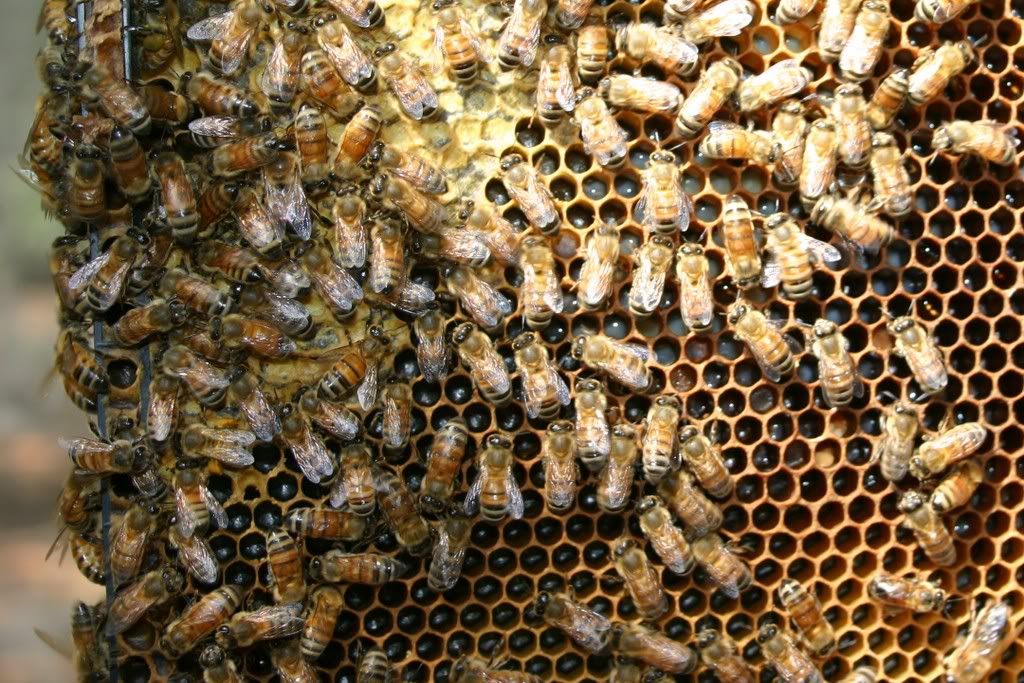
t of the way, I slid back frames 3 and 4. I know the brood should start from the middle out, so I decided to pull frame 4 up and out. No need to be an expert to see what I was looking for. I could see good groupings of uncapped brood and tons of eggs on this frame (click on picture). By now I’m sweating up a storm wearing a long sleeve shirt, gloves, and a veil in 95 degree weather. So I called it a day, replaced the frames and closed the hive up. Twenty days of waiting and worrying. I did absolutely nothing, but I feel like such an expert when it comes to re-queening.

So what’s next? Finding out when and how is the best way to start replacing the frames in the hive for new fresh ones. My though, but is just an educated guess. Move the outside frames (1 and 10) out. These outside frames are nothing but honey, extract them, move all the other frames out, and install two new frames in the middle. Let the bees fully draw this new frames out, and rearrange the hive. Then repeat the process until there are all new frames in the box.

Friday, August 24, 2007

Second Time Around

A co worker of mine had given some thought to being a beekeeper himself. After talking bees with me, he decided to do it. Luckily for us, he lives a few miles down the road from one of our local beekeepers. I’m talking beekeeper with over 100 hives on his property alone. He jumped into the hobby, and I restarted mine by purchasing one of the beekeepers hives. Actually, we had him transfer frames into his, and then into my hive body.


So here is my new set up, so far it has worked great to control all my ant problems. One M01691G VIZ PLASTIC HIVE STAND/VENTILATED BOTTOM BOARD from Dandant.com, for $30 plus shipping, landscape timbers cut to the length of the hive, cement pavers, and under all that some weed block material. Is about ten feet away from the previous location on higher ground, and now it faces south.

Still, nothing is ever perfect. The new Stand/bottom board has some great ventilation. Unfortunately some of the bees can squeeze out of the holes when you close the entrance. Found that out after I went to pick up my hive from the beekeeper. This lesson was worth 2 stings) As we put it in the back of my car, the car filled up with a few bees, so to resolve the problem I lifted the body off the hive away from the stand, and the beekeeper slid a piece of screen (between base and hive body) to close the hive up. Simply, it was not an easy task when it was all done, and unfortunately …… I either lost the queen or injured it. Five days later my local state inspector showed up, and he revealed the fact that there were no new eggs on any of the cells, and 4 new capped queen cells. BUMMER!!!!! He said “strong colony, wait 20 days. Everything will be ok if they can raise a new queen”

So I have a really neat setup, and bees without a queen. They are working on replacing her, but you just never know it they will succeed, and I won’t know till the 24th of August. The day has been marked on my calendar from day 1. For 20 days I have been waiting to find out if the new queen emerged, mated properly, and made it back. Failure means I will be on my 3rd try, I‘ll make sure to take my regular hive bottom, so there is no repeat of last time.

In the meantime I noticed the moats are too deep, and the bees kept drowning in them. I tried discouraging them from drinking the water by putting a layer of oil on the water, which was completely unsuccessful. Next, I tried making little landing boards so they could land on them and drink out of the moats. Didn’t work any better. My final solution which seems to work very well, was to drill a hole on the moat’s side wall to keep the water level to about ¼ of an inch deep. Even it they fly in for a drink, they should be able to fly out or walk out, but the water level is still deep enough to keep the ants out.

Rise and Fall of Original Set up


Here are the bees after been sprayed with sugar water. The day I installed my package was a very exciting day. It was late April, my hive had been ready and in position for a few days. I took my package, sprayed them down with Sugar water, pried the cover open, tried to pull the syrup can while holding on to the wire that held the queen cage, and ran into the 1st hurdle. We all know Florida is humid and we all know what happens to wood in humidity, right??? Yep, it swells up - Bloody syrup container wouldn’t come out for anything in the world. After a slight panic I decided to put the box on the ground, put my knee on the box, grab on to the can with both hands and pull. I was smart enough to put the lid near by so I could close the box once the can was out of the way. After some wiggling and pulling, the syrup can slid out, and just a couple of bees were able to sneak out before I was able to replace the lid on the package.

This is the moment I realized that both hands were on the can, and there were none left for the wire holding the queen’s cage. In the words of Homer Simpson - DOH!!!!!!!!!!!!! So now I have a box of mad bees with a caged queen rolling around in there somewhere. I accessed the situation: had the nice beekeepers gloves ON. Solution - open the hive, dump half the package until the queen’s cage is visible, reach in and grab it, and close the box again. I pulled it off beautifully, but now I have a lot of really mad bees flying around. As fast as I could, I placed the queen in her place between the middle frames, dumped the rest of the package, closed the hive, and ran for dear life with a total of 3 bee stings.

Four days later I came to look at the progress. I had some uncertainties. First there was what it looked to me like a LOT of dead bees. I know some die in transport, but I don’t know how many, but there were too many to count. I took the hive off the bottom board and dumped all the dead bees out. Second, the queen was still in her cage. Luckily I looked at the hole, and noticed that one of the staples holding the mesh had gone from the top, right into the hole. The point of the staple was sitting there like a sharp stake at the bottom of a hole; most likely that’s why she hadn’t been released. I pulled the screen up and she ran down the frames. From then on, the bees did what bees do and they looked great.

These are a couple of the best pictures I took while inspecting it.
Make note of my gloved finger on the top left of the picture. The queen was no more than maybe 6 inches from my finger. I took the picture, looked at the frame, but never saw her until later while looking at the picture. Things looked great.

The funcky comb on the upper right is the original place where I placed the queen cage. The next one is probably a forager transfering nectar.


The fall came in July. We were on vacation, so I’m not sure what happened. What I know is that before I left, the colony had drawn out 5 full frames and it was thriving, so the Small hive Beetles were also beginning to thrive. The day before we left, I decided to install the SHB trap in the sandwich container, and to remove my entrance reducers.

Two weeks later when we returned from vacation, I came back to an empty hive. All that was left were the frames full of Beetles, the maggot looking larva worms, and about 20 young bees that were flying around wondering where the heck every one had gone. Not a drop of honey left. All the honey and pollen cells had been nicely uncapped and cleaned dry. I don’t think anyone but the bees would have done that.

As I took my set up down to clean the mess, I found a Red carpenter ant colony between the landscape timbers and the wheels. I ‘m assuming with all the rain, the ants moved up, started harassing the colony; the colony got fed up and moved away. I can’t be sure, but that’s just my best guess from the evidence.

Wednesday, August 22, 2007

Lessons of my original set up


You are looking at a Beemax Polystyrene hive, part of a beginners kit purchased from Betterbee. Picture is: one Hive body, BeeMax Telescope Cover, Polystyrene Hive Top Feeder and Bottom Board with Built-in Varroa Screen. Everything is sitting on 8 foot land scape timbers, which in turn are sitting on a set of old car wheels/rims (had them sitting around. I figured I try putting them to good use.)
OK, so here are the problems with the set up. The color is NOT a problem by the way. To get the kids involved in this, I let them pick the color.
  1. I located it too close to a grouping of Cabbage Palms (the state tree of Florida ) It's a great bee tree, but a leaf stalk attaches the frond to the tree. It is 4' to 7 ½' long, the old fronds die and fall off as the palm grows, but the stalk remains on the tree until the trunk gets thicker, and then they all fall. The area under the palm becomes a mess for years until all the stalks fall off. The mess creates a play ground for carpenter ants feeding on the wood, and if not picked up, they'll nest on the pile.
  2. The hive is in an area of my property that I had never visited after several days of rain. Turns out after a good storm, it would sit in about two inches of water. I never needed to get to it when it looked like an island. Can't imagine it would have been fun to stand in a huge puddle to inspect the hive, and it also would get a lot of splash up dirt. The bees would spend hrs cleaning the landing board, and I was afraid some splashing was coming up the bottom screen
  3. The bricks by the entrance are my idea of an entrance reducer. It worked, but they needed to be solid. I noticed several intruders dashing in the holes of the bricks, and the guards were not able to follow.
  4. The timbers were too long, and walking around the hive was hard since I had to step over them, or go way around them
  5. The rims/wheels were nice and solid, but they didn't stop weeds/grass from coming up
I did face it to the east so, the hive would get to work nice and early. It also had great wind breakers to the East and South. I installed my 1st 3lb package of bees in late April. They thrived for 3 months, until they decided to move with out leaving a forwarding address. - more on that later

Powered by WebRing.
Powered by WebRing.