Sunday, September 23, 2007

First Day of fall

----- For all of today's pictures; click here ---------

The experienced beekeepers in Florida are waiting for the fall honey flow. This is the time when Florida hives collect their winter stores. For weeks I have been reading in beekeepers forums how everyone up north is buttoning up their hives preparing and planning for the winter. Here in Florida the 1st day of fall means no more low to mid 90’s temperature…bring on the upper 80’s.


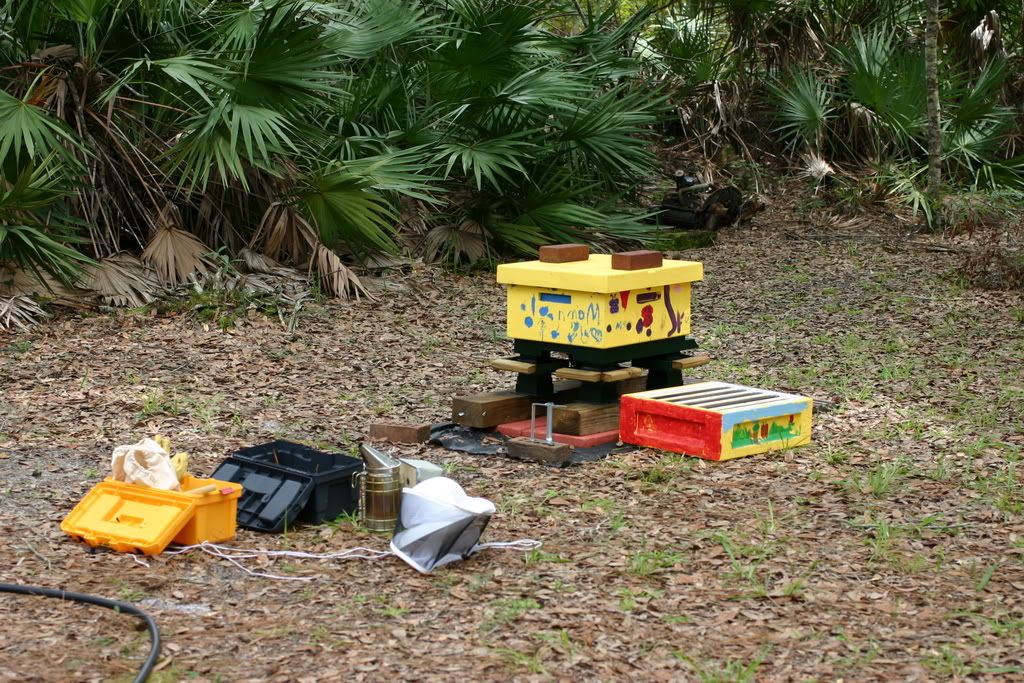
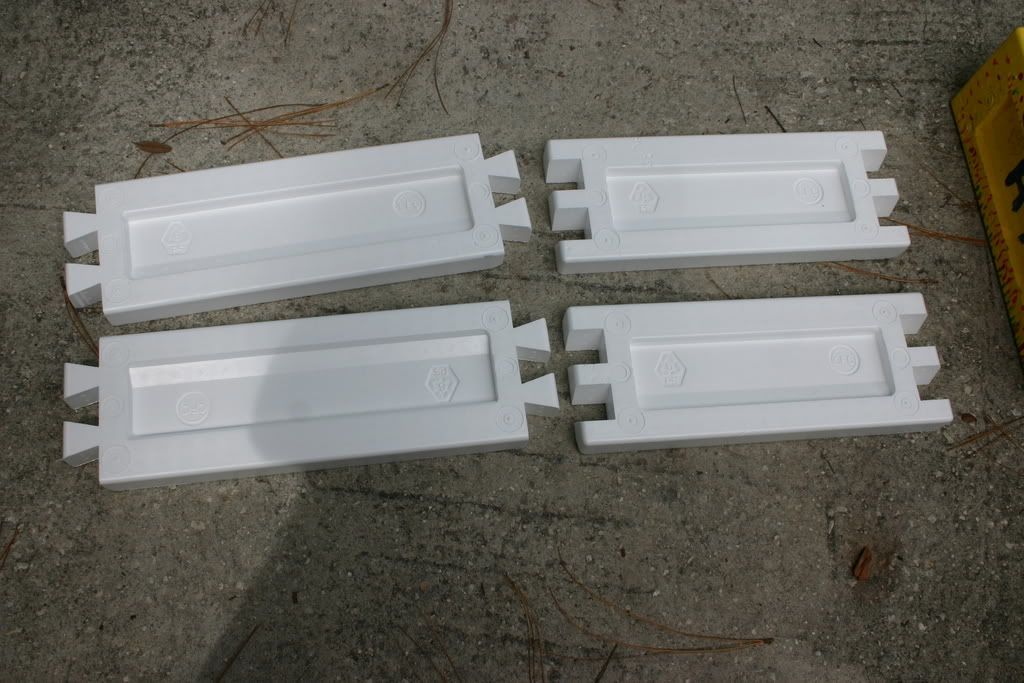
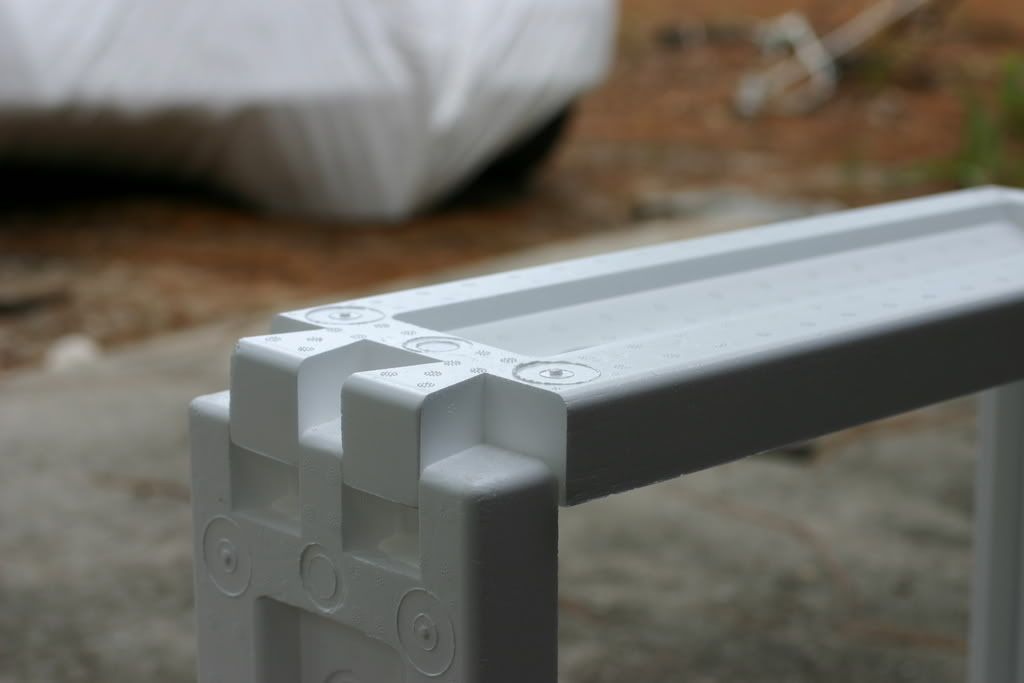
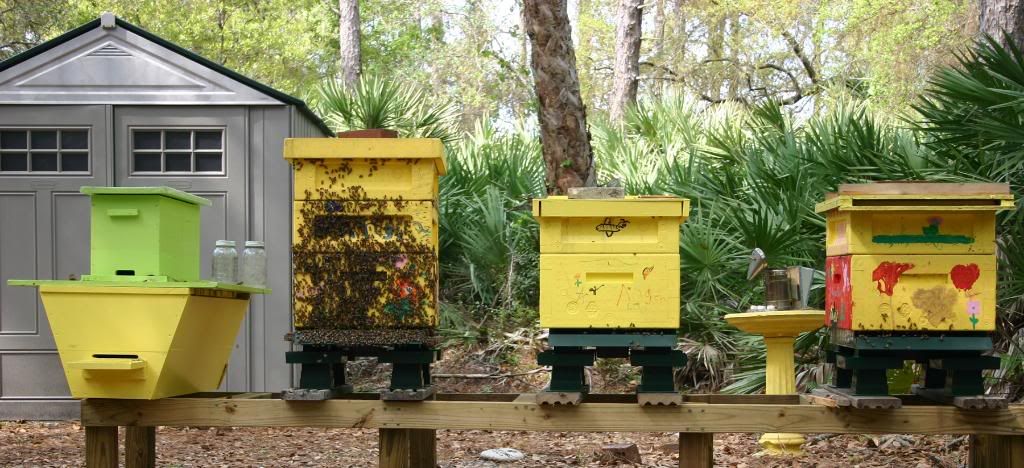
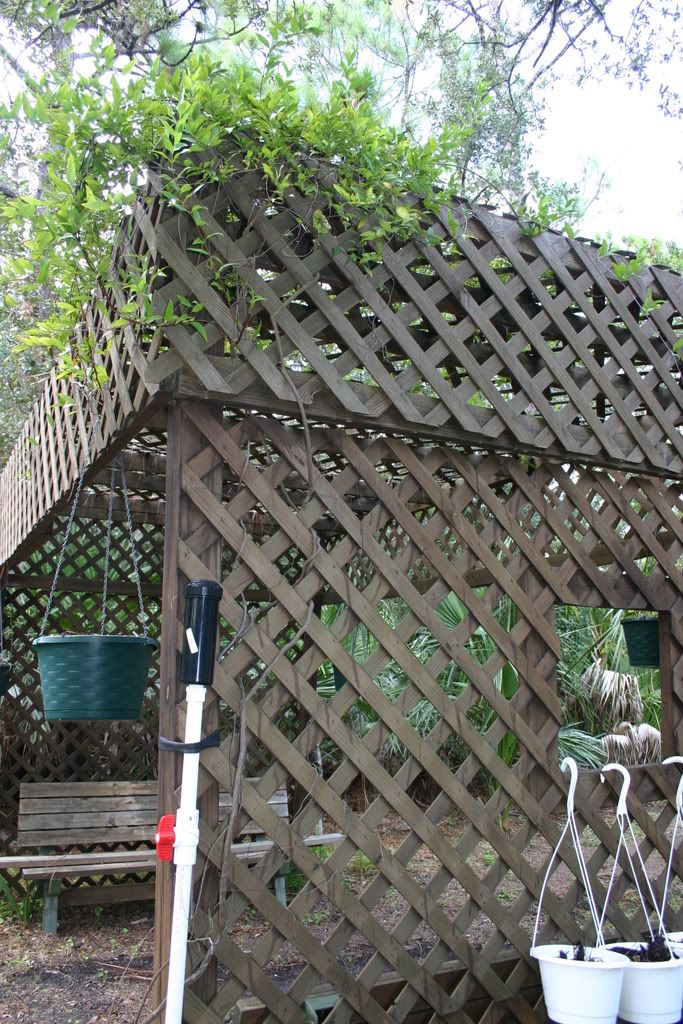
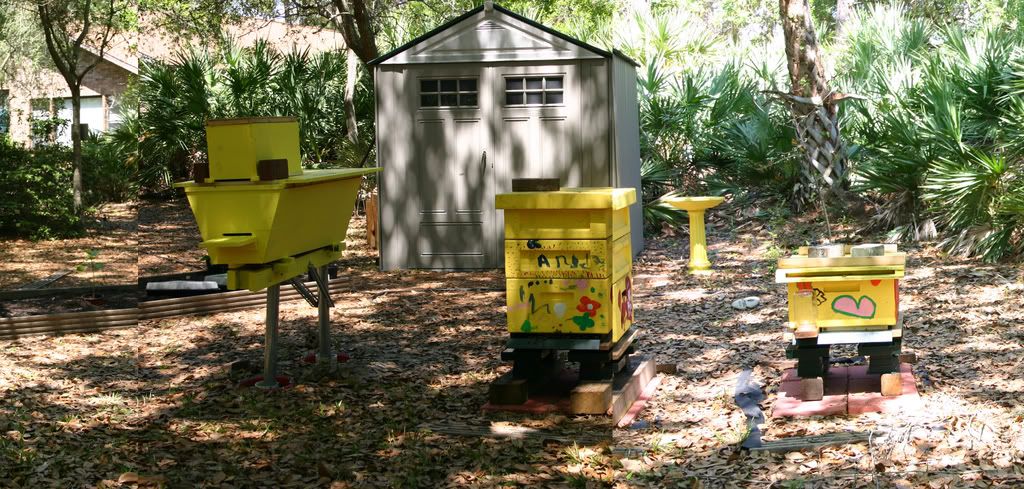
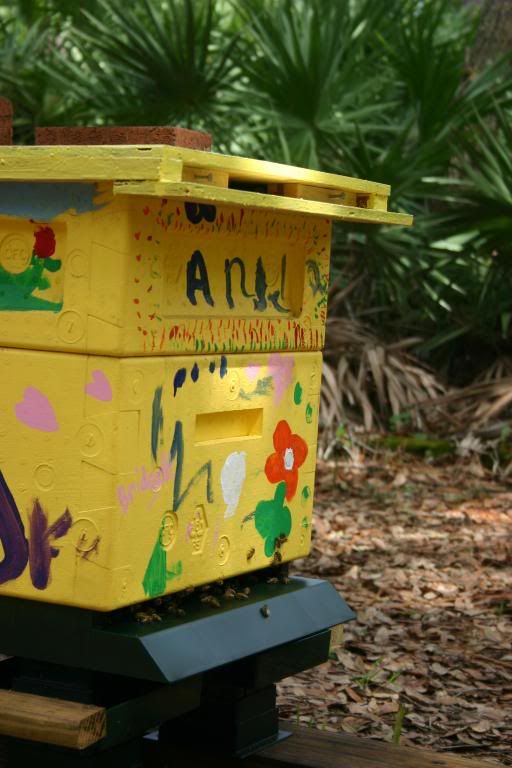
Due to the heat, the high humidity, and the anticipated honey fall flow; I gave my hive a new top that implements an upper entrance. The hot humid weather equates to the bees having to fan the hive in an attempt to move fresh air in. I also wanted an easier time prying the top cover off the hive during inspections. The Beemax top fits incredibly snug and it is impossible to insert the hive tool between the top and the hive body to pry them apart. The picture shows the inserts in place to create the top entrance (click on any picture for larger view), I can also pull them out to eliminate the entrance. It telescopes out and down on two sides and incorporates a landing path on the front when open, and in the back it allows me to insert my hive tool between it and the hive body.

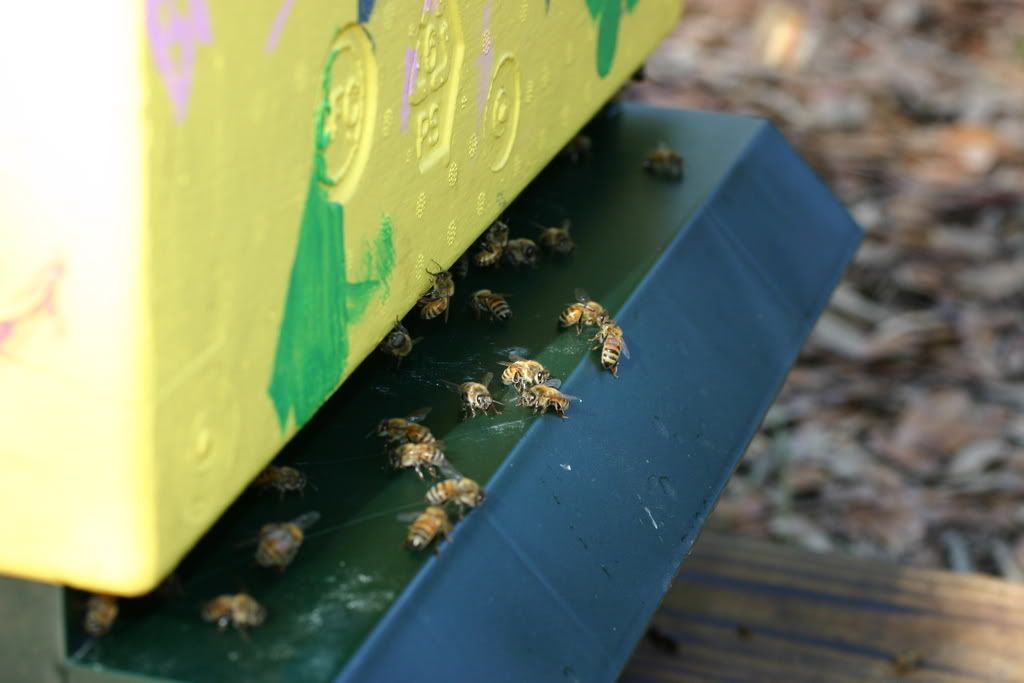
Today was not a good day for pictures, the sky was overcast (slow
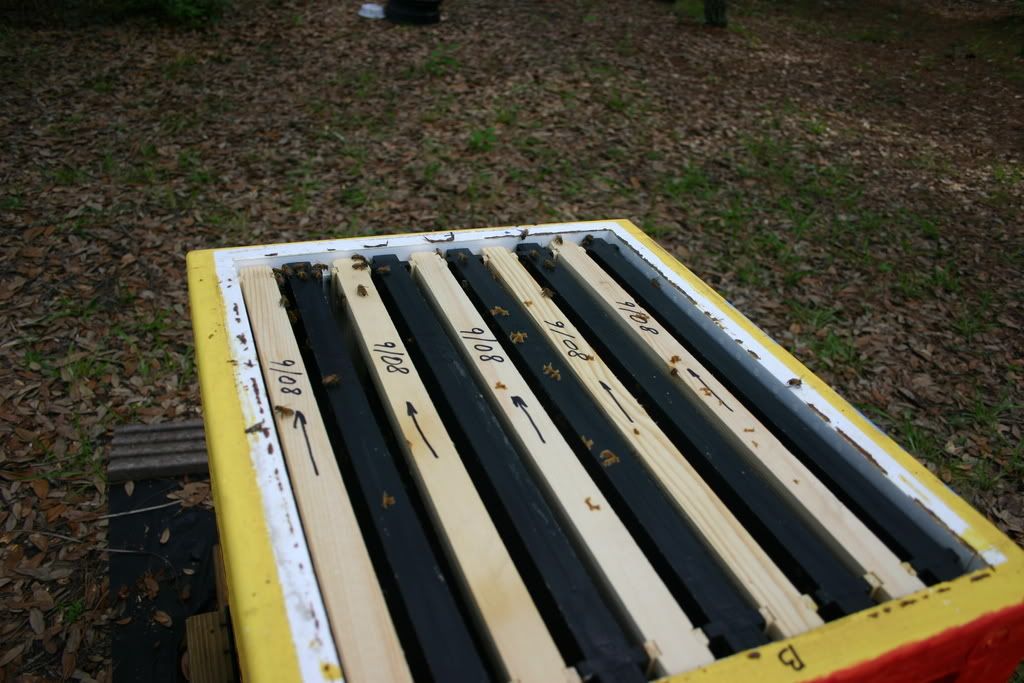
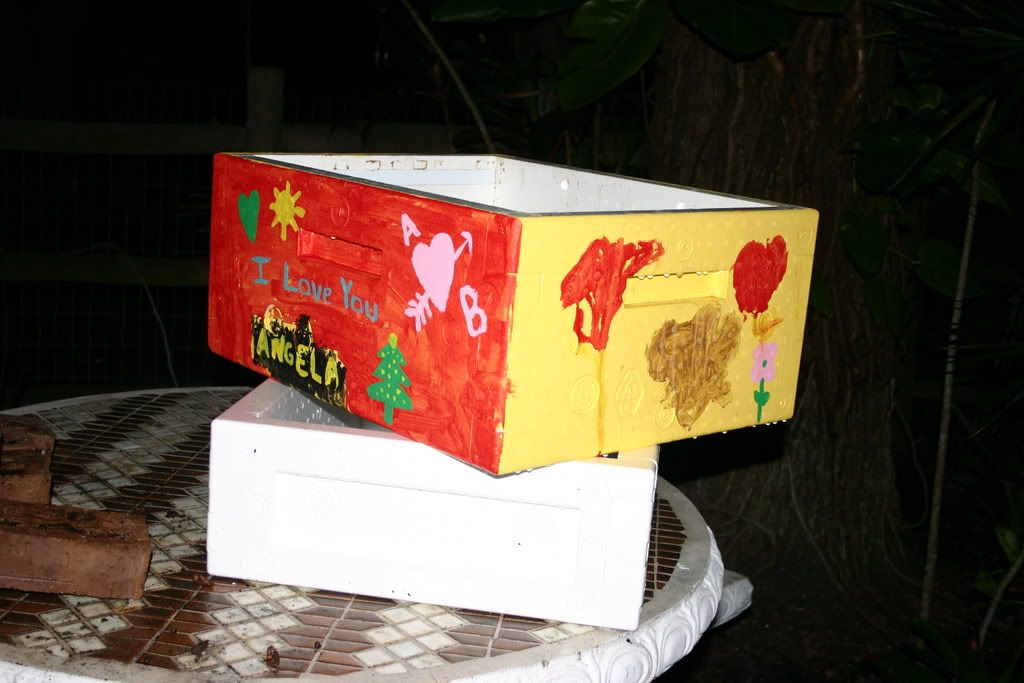
shutter speeds on the camera) and light rain sprinkles were on and off the whole day. Here is a picture of the main hive body after the medium supper was removed. I wanted to explain what I mean when I say Frame 1, 2, 3, 6 or 10. The picture is taken as I’m standing behind the hive and from right to left is frame 1 to 10. The hive’s entrance faces 
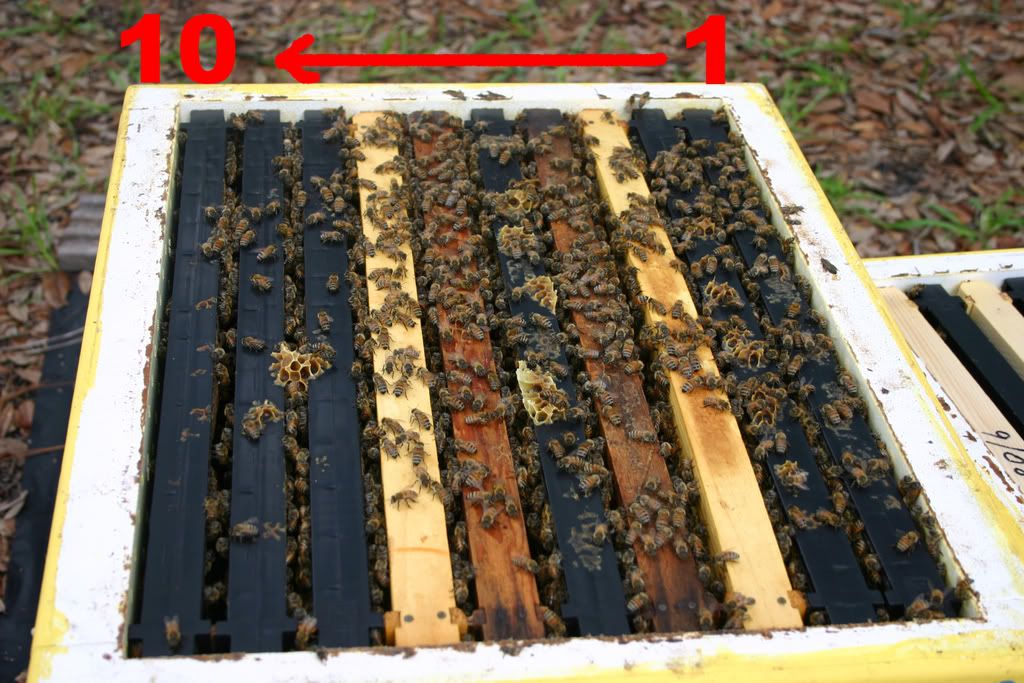
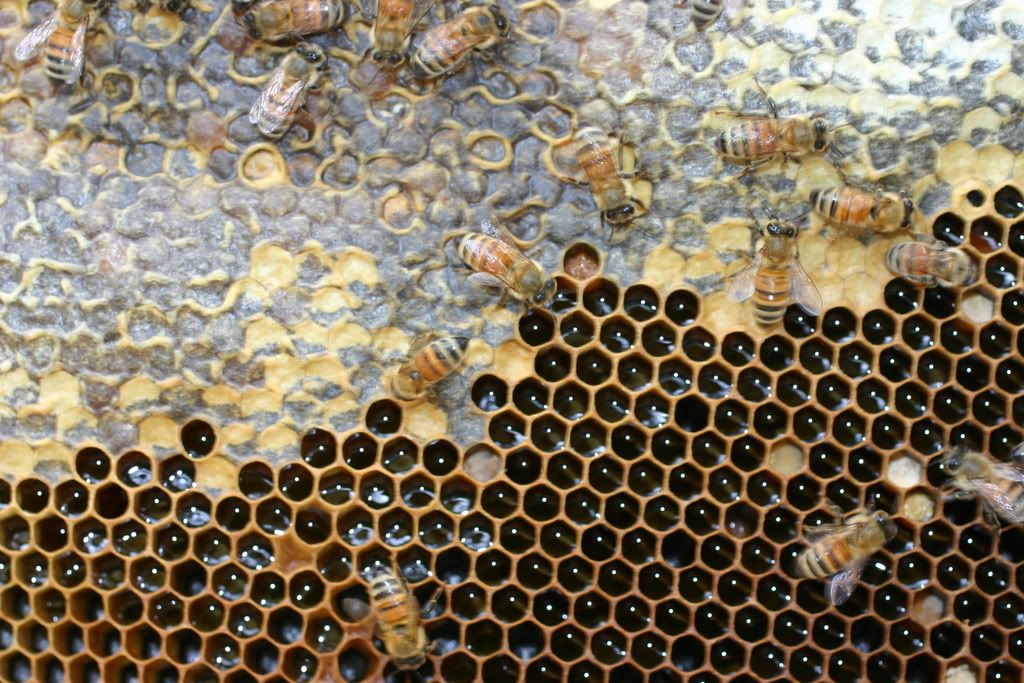
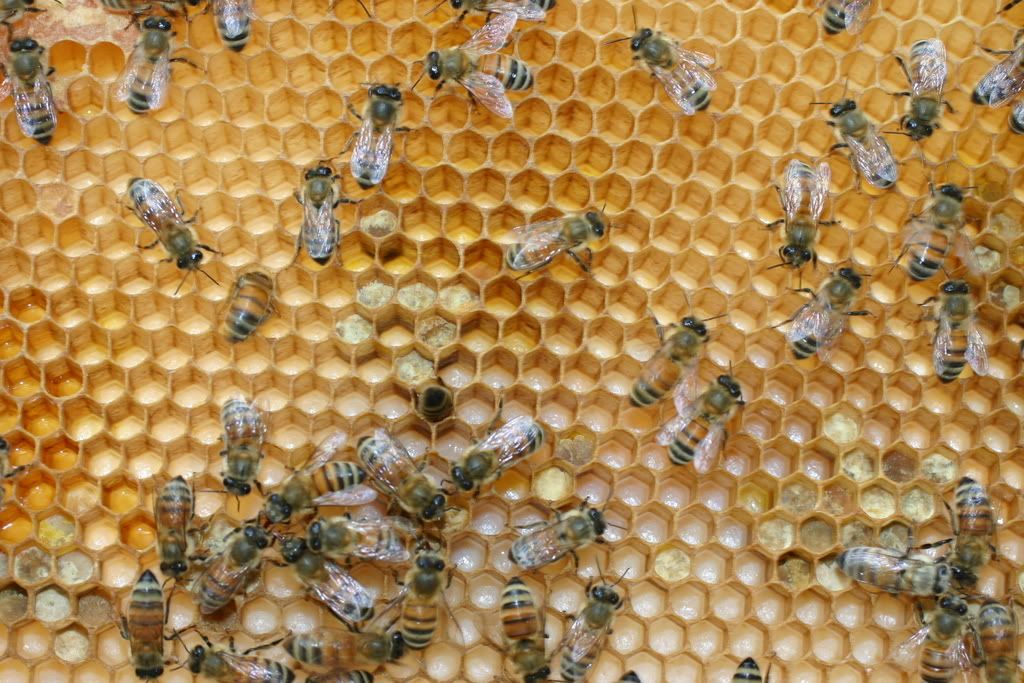
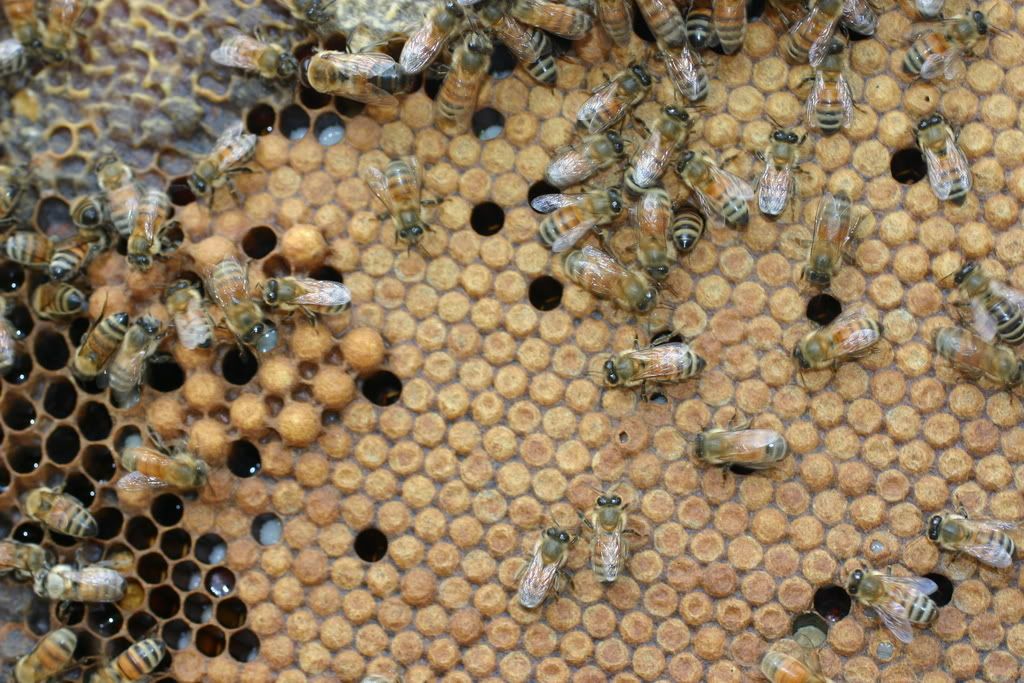
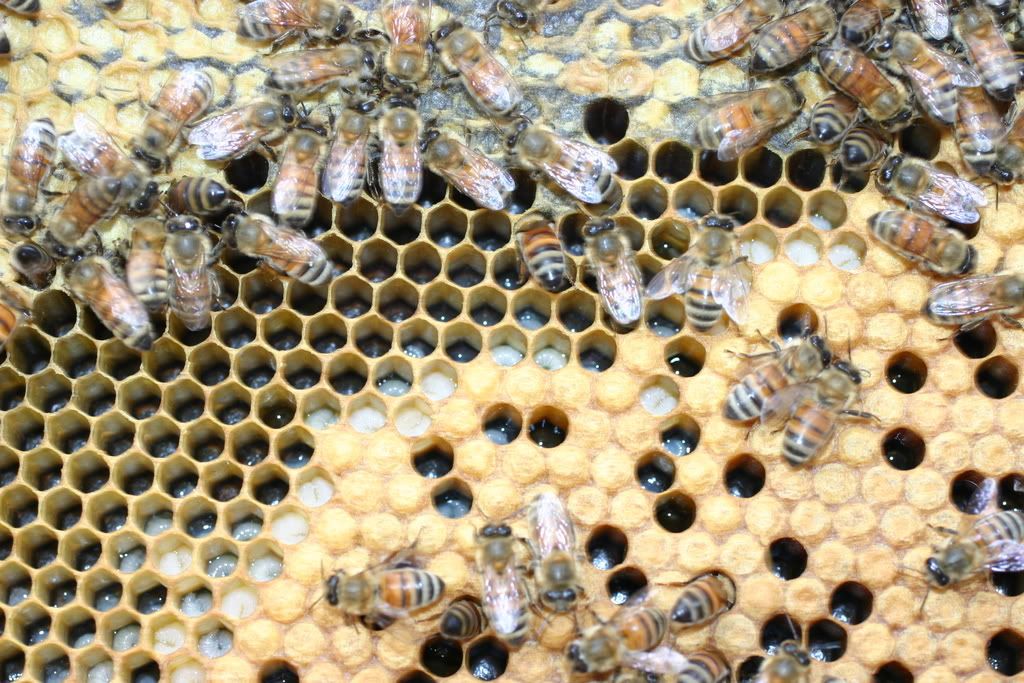
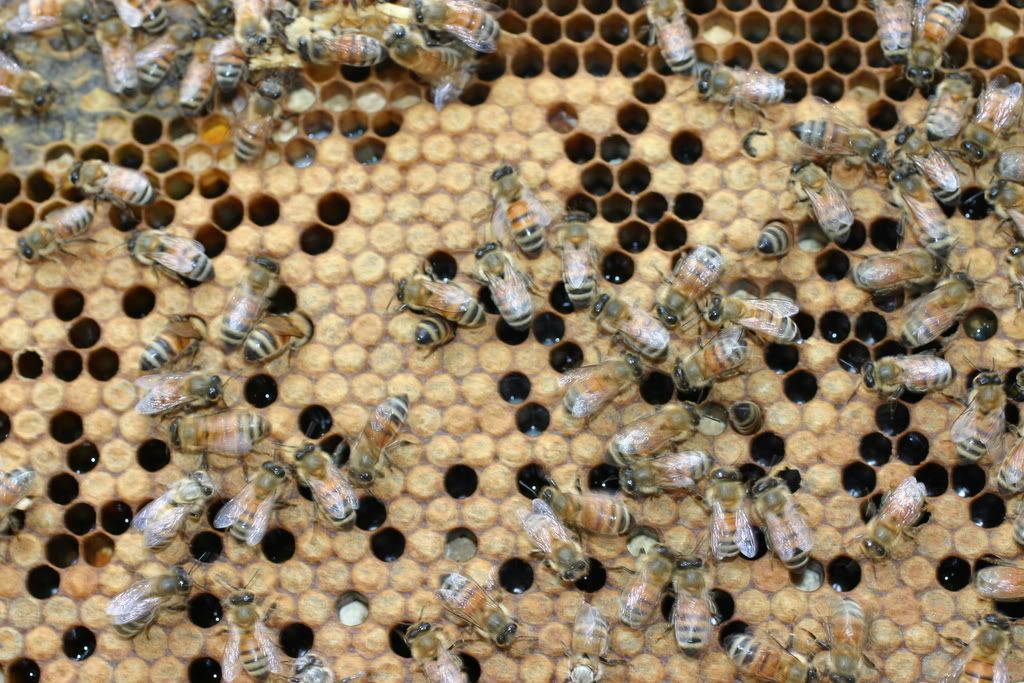
south, and frame 1 is to the West. Each frame has two sides, so each frame has an east face and a west face. Two weeks ago I inspected frames 6 to 10. Today I wanted to take a look at the other side.

I have never seen the queen aside from a partial picture of her abdomen two weeks ago. I still haven’t seen her but I see tons of her work. First, Frame 1 East: Capped Honey (top), pollen (scatter reddish cells), uncapped nectar (uncapped nectar = pre honey) Frame 2 East and West are almost carbon copies, capped honey (top) and uncapped nectar. Frame 3 has me a little worried, not because of the tons of uncapped brood but because it is warping. Warped frames are not easy to remove or insert.
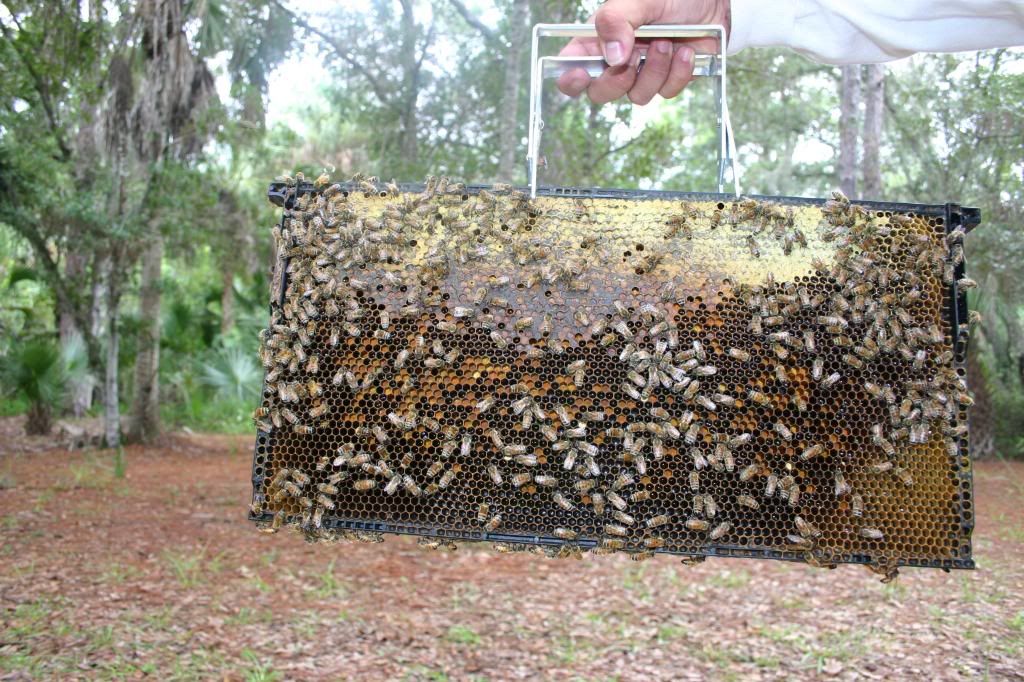
The surprise of the day was on the underside of frame 4. I knew two weeks ago the queen had no room to lay another single egg which was why I added the medium supper. The new space didn't stop the bee's plan to solve the space problem. Their solution was to draw comb underneath frame 4 where about ¾ of those cells had eggs in them. I didn’t know what else to do but remove the mess and freeze the wax for future use. After I closed the hive it dawned on me that I have never removed frame 5. Oh well, there will be another day.

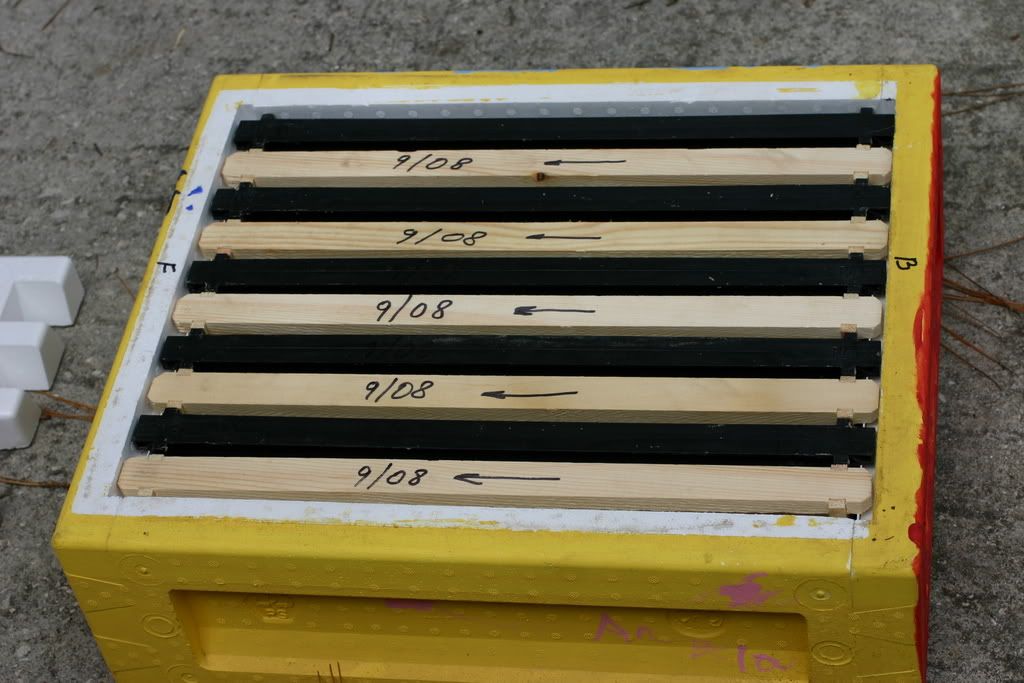
A quick look at the medium supper before closing the hive revealed the winner between plastic frames and foundationless wooden frames. With out foundation the comb is drawn from the top down. So it might not be a fair contest since the bees seem to be slowly moving up.

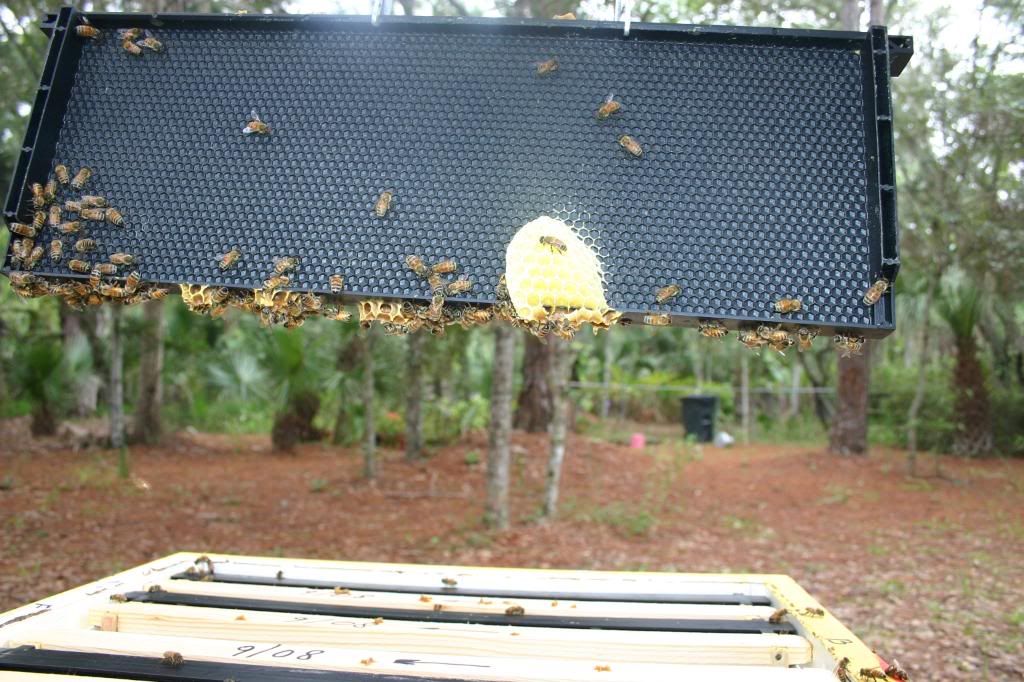
It was a good inspection day unless you count the sting on the back of my thigh (Sting count is now 7). It happened as I turned my back on the hive to place the smoker down. Little bugger got me good, my leg has swollen from mid thigh to just past the knee. The sting in itself is not painful; it’s trying to move the area that causes some pain. The area has swollen as much as the skin will give and the usual redness and increase temperature in the area are present already.
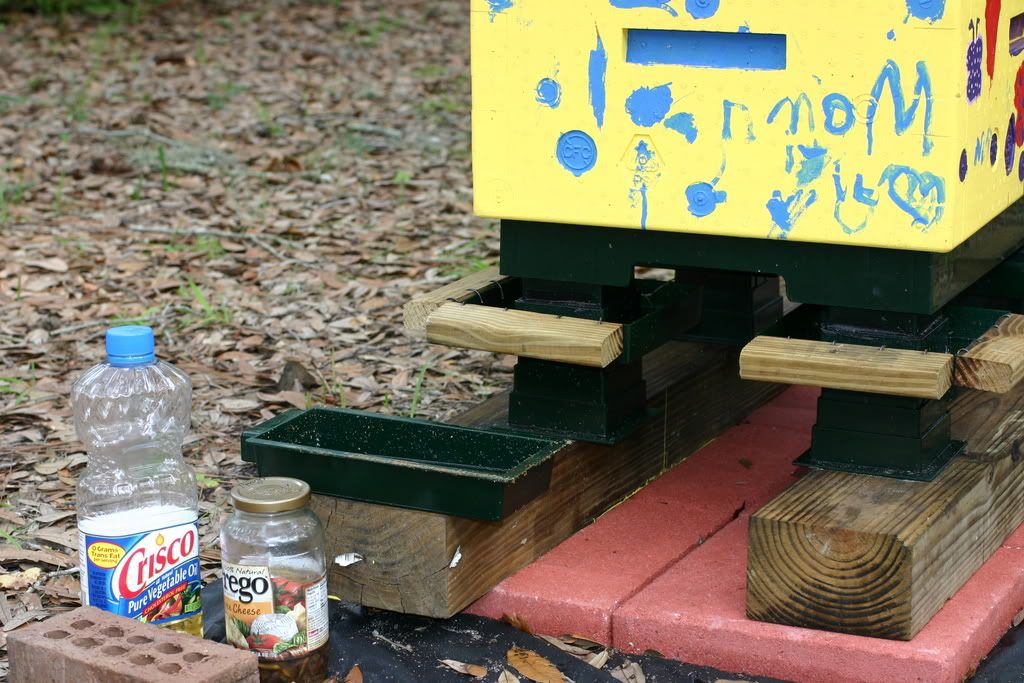
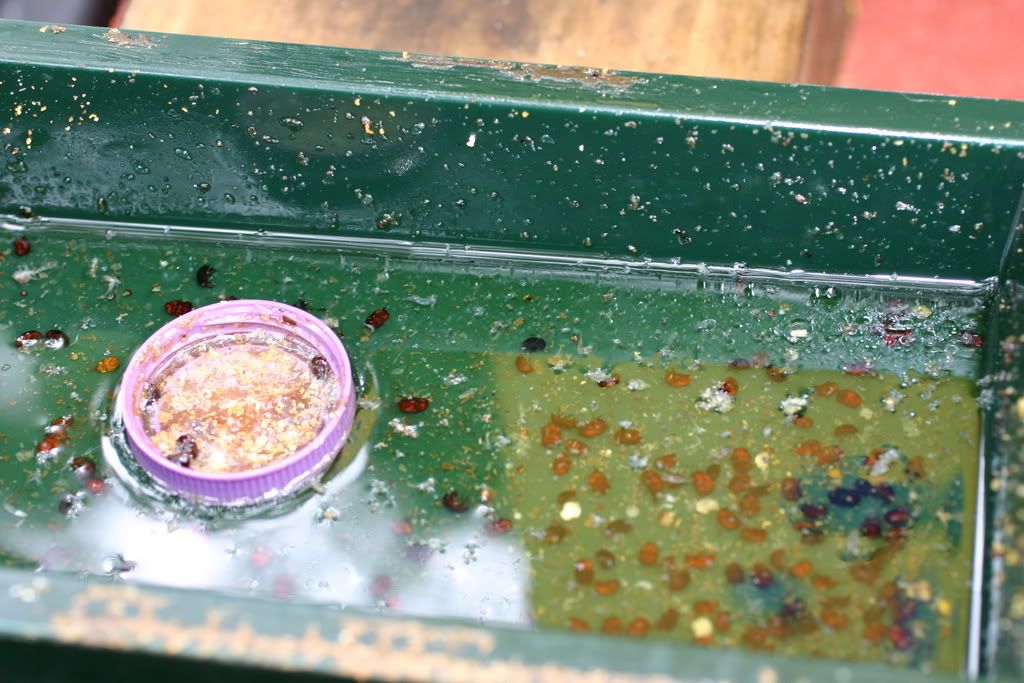
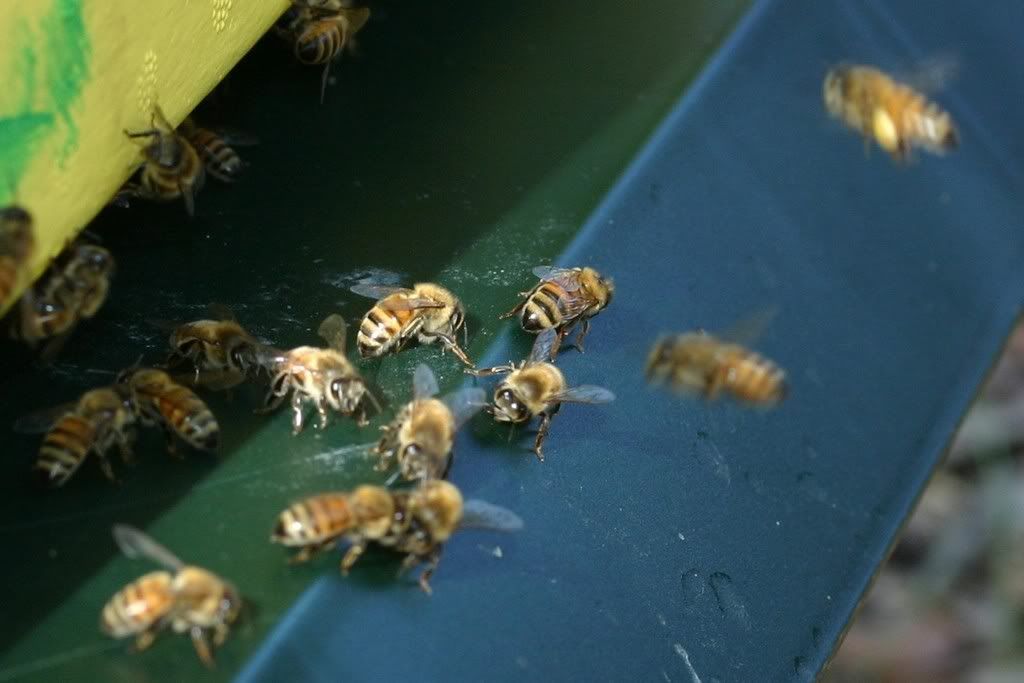
Small Hive report: After a slow start this week, the trap is collecting it's usual number. I'll try and do a full count tomorrow. I say forty.

Monday, September 17, 2007

SHB Larva in Trap

It has been almost two months since I brought home the hive, and from day one there has been no lack of adult Small Hive Beetles (SHB) in the trap. I inspect the oil in the hive drawer and re-bait about every four days. The usual number of drowned adult beetles is about thirty, give or take a hand full. The only lull came about a month ago when for a week there were only four beetles in the trap. I was just one day away from cleaning the oil out of the inspection tray for good when all of the sudden the body count spiked up; twenty the first week and then back to thirty or so the following week. The trap has done its job of controlling the beetle population. There are plenty in the trap but it is very rare when I photograph or see one in the hive.

This weekend was the first time I found two SHB larvae drowned in the oil. The wax moth and the SHB larva are very similar in appearance, but my online research confirmed the fact that it was a beetle larva. The UF dept of Entomology and Nematology website helped me identify the larva. “They can easily be distinguished by the presence of six prominent anterior legs. Wax moth larvae have a number of smaller less-developed, uniform prolegs.” What does a “have a number of ” legs mean anyway??? Has no one taken the time to count how many legs the wax moth larva has??? Does MORE mean 7? maybe 8?? Anyway, the macro lens pictures show the six prominent legs, therefore SHB larva. (Click on pictures for better views, Oh and the ruler shows about 12 mm in length, NOT over and inch)

I was somewhat alarmed, since I had added the medium supper the previous week. I had thoughts of the bees not being able to patrol the extra space, and the beetles and its larva running amok in the additional space. With that fear in my mind and curious to see if the bees had selected the plastic foundation frames, or the wooden starter strips on wooden frames, I decide to take a quick minimally invasive look.

Here is the side of my hive that had never been photographed before; it is sort of the dark side of the moon that hardly any one gets to see. The next picture is of the medium supper on the hive with the top off. The bees always seem to be building burr comb on the underside of the cover. I imagined with the additional space the top cover would have been free of bees. I was shocked to find that the top underside of the cover is as active, if not even more active, and cells are being drawn between the supper and the brood frames. There are plenty of bees hanging around the empty frames of the supper, but there seems to be no work being done on them. There should be plenty of laying space in the brood, but my goal was to be as non intrusive as possible. I’ll take a better look next Sunday. My fears were put at easy. Not a single SHB or its larva to be seen.

The goal for the next inspection is to take a look at a couple of frames with brood, honey and pollen stores. Speaking of which, this weekend I noticed dark red pollen been brought in. I found this entry on Wikipedia. I though pollen only came in yellow. I wish there was a simple way to tell where the pollen is coming from.


Tuesday, September 11, 2007

I'm Official

The State of Florida says I'm beekeeper FL0050604R. If my state commissioner Charles H Bronson says so, then it must be true.

I can now "engage in the sale of distribution of honeybees", have the paper to prove that's what it says.

Putting together a spread sheet of my local pollen counts. ZIP 32934 (Click for larger view) The plan is to update it once a month for a couple of years. Monitoring the pollen count should help me make future predictions., and learn when my honey flows should occur.

Data provided by http://www.pollen.com/, well, is not really been provided by then, I'm just retrieving it daily from them.


Monday, September 10, 2007

Good Inspection Day

I’m getting better and more confident at inspecting the hive. Armed with my new frame grippers, things went smoother than they ever have. Not perfect, but smoother. The picture shows my two tool boxes, one has my actual tools (frame gripper, hive tool, a couple of screw drivers, and beekeeper gloves just in case). The second tool box holds my smoker fuel (pine bark and pine needles). I collect those when the weather is good, with the afternoon showers; you just never can count on finding any dry needles or bark. I usually put a layer of pine needles, then pine bark, and finally another layer of needles. Not in the picture is my butane welding torch. I took the picture on my way back from having to go get it. The torch is probably a little of an overkill but one blast of the torch and the smoker is lit from top to bottom.

I’m still toying with the idea of making a new hive top cover or modifying the current one. It fits too snug, and the bees do such a good job gluing it down that it takes a lot of patience and wiggling to pry it off. I might cut the front and back telescoping sides to be able to insert my hive tool to pry it up. The worst of the summer is over, so I don’t think I’ll need to vent the hive, but making a top entrance, and venting by lifting the cover would be a lot easier if I modify or make a plain top cover.


I gave the hive its usual puffs of smoke under the screened bottom, the entrance, and once I had the cover loose in the top. I readied my frame puller, waited a minute, and WITH OUT my beekeeping gloves proceeded to open the hive. I had never pulled the frames on the east side. I pulled frame 9 , it is completely drawn out, but the outside of it is empty, opposite side of it is full with 80% uncapped honey (picture) . I placed that frame on top of the top cover, and leaned it on the body of the frame.


When I pulled frame 8 I was surprised at how heavy it felt. It was full of Pollen and honey (picture) , not a single cell open. I replaced it but moved it out, to get better access to Frame 7.


The outside of 7 was full of caped honey, but the inside was full of brood. Mostly workers but also a hand full of drones on the edges. I'm very surprise they are raising drones so late in the season !!!!!!


Frame 6 was nothing but brood from top to bottom (see picture), a little bit of capped honey on the upper outside corners. Frames 5 and 4 were the typical capped honey on top, a band of pollen below that, and then the capped brood. I’m no expert, but I think I have a very good laying queen. I was getting hot again, and a wasp stung me as I was putting my hat and veil on. Not sure where I picket it up, but it was in the veil's netting, I though it was dead so I pulled it off, it then flew right at my cheek and stung me. Two feet away from thirty thousand bees, and a wasp gets me ...... what are the odds???? Either way, my face hurt, and I was getting very hot again in 92 degrees. So I called it a day.

I’m very satisfied with the progress, but also slightly worried that they might decide to have a late swarm. The queen has a lack of laying space in the brood frames, there is just half of one frame empty for food stores, they are raising drones, and we are having very good Florida weather. My Hyacinth plant even had a second bloom. Notice in the picture the first batch of flowers going into seeds, as the bee works the second blooms from this week. I decided to place my medium supper on. I have no intention of harvesting any of this honey, if they even decide to move up, but it would be nice if they worked some of it to make sure there is enough food for the winder. You know that week or two that we might hit 30 Degrees Brrrrrrrrr. If they do move up, then next spring I can just put in my queen excluder, let what ever brood might be there hatch, and then it can be use for honey stores. I’m also very curious to find out if they prefer plastic or wood, foundation or foundationless.

My mistakes during this inspection:

  1. Assume the wasp in my veil was not alive
  2. I forgot to pull frame 10. I know is drawn out, but I have no clue if the bees are using it yet
  3. Change the macro lens to the wide angle lens. I get some awesome detail with it, but I don't get the entire frame in one shot
  4. Forgot to clean the old queen cells
Here is a candid shot of yours truly. I did wear my hat and veil, Jeans, thin long sleeve shirt, but no gloves. I'm just making sure the new super is lined up correctly on the body. My final thing for the day was to reload the bottom inspection drawer. Second picture shows it, the Prego jar is where I keep my bait, and the tall bottle is my vegetable oil. All the pictures in this post were taken on Saturday, except for the last picture that shows how good my bait and trap are working. I like to add that I saw no Small hive beetles in the hive, nor did any show up in the pictures. They are all in the trap. My attempt to bait and trap outside was a failure. Did nothing but attract ants into it (not a bad thing mind you), and the one away from the hive kept getting tipped over by some critter.


New Toys

Beekeeping sure is a lot of fun when everything is going like it should. On Friday, a day before my inspection, the new toys arrived in the mail from Dandant.com.

The first toy is one Beemax medium Super ($11.80). I want to consider myself an organic beekeeper, but sometimes I feel like using Beemax hives and plastic frames is anything but organic. My thought on it is that I’m putting to good use some plastic/foam on its way to a landfill. The best way I can think of describing Beemax products is to imagine taking regular packing foam, dipping it in Fiberglass resin and then shaping it like a Hive. The material is harder than packing foam, lighter than wood, but it probably doesn’t have the flexibility that a plank of wood would have. Meaning that if I were to sit on a wooden plank the same size as one of the Beemax pieces, the wood would bow but still hold me. I don’t think the Beemax material will, but it seems to be design to take the weight of a hive. All my hives are from Beemax, two deep brood boxes and three medium supers. I can’t say they are the best things I have ever used, since they are the only things I have ever used. Lets say I am completely satisfy, and so far have no complains about it. I like how simple they are to put together, and I can’t imagine that the high Florida humidity and afternoon rain storms will make the material flake the paint off, warp, or rot away. Aside from the four hive panels, the only other thing to assemble on the beemax bodies are the two frame runners. These are simple "L" brackets who's short ends slide into the panel. The beauty of the Hive is how light it is, and how fast it can be assembled. The picture shows my new medium supper all lay out. Notice the bottom left is upside down - it is possible to assemble it upside down. The edges won’t be even with the adjacent sides, so confirm all sides are in the right orientation before you tap them together. Just in case you do what I did today and in the past, it is not impossible to slide them apart as long as the glue has not dried.

The assembly is fast and requires no tools, just glue and your hands. Apply some glue, line the edges up, and tap it in. Put the kids in some old clothes, get them some paint, and let them have some fun. While I was putting my new supper together, I let the kids decorate my deep box. This one is going to be my second hive early next spring.

My next toy is a Frame Griper; I simply don’t know how anyone does without one. It makes pulling that first frame out so much easier. The bees don’t seem to care about the cold metal intruding into their space. A few decided to investigate the metal, but I didn’t mind as long as it wasn’t my gloveless fingers they were investigating. It was well worth the $14.00; I felt like a veteran beekeeper pulling and replacing frames into the hive. I was displaying more confidence with my new frame griper or the bees were a lot calmer during my inspection. I hardly found a need to smoke them.

Last thing in my order were ten wooden frames, $8.60. I decided to assemble the frames, use a plain wood strip as the starter strip, and to alternate plastic and wood frames in one of my medium suppers that came with my starter kit. I wanted to have it ready depending on what I saw during the inspection.

Monday, September 3, 2007

Bee and Plant Garden

Updated, March 15th, 2009

I always enjoy working in the garden. I like collecting unique plants, growing them from seeds, but never looked at them as bee friendly or unfriendly plants. To me a good plant is low maintenance, drought tolerant, and unique/rare. Now, it must also be friendly to bees, in other words, it should produce nectar and pollen.

This is my bee yard, it is not ideal but I have to make it work here. I think it will work, and I can imagine a total of 3 hives, hopefully one of them a Top Bar hive. The house is on the left, and my driveway is on the other side of the Palmetto's in the background. The shed I picked up from a friend at work. A casualty of her neighborhood by-laws makes it my honey house, bee equipment, and storage.


Cons –
-Too much shade. Shade is supposedly prefer by Small hive Beetles.
-Too much yard debris on the ground. Attracts ants
-Falling branches that may damage a hive.

I can control two of the three problems. My set up I believe has the Hive beetles, and the ants under control.
Pros –
-Lot of Pollen and Nectar Sources near by.
-My logic is that shade frees up bees from fanning duty. A hive under the full Florida sun probably must be fanned by bees to keep it from overheating.
-NO grass or weeds to mow, as the picture shows, very little grows under the canopy of the trees

As things flower and look their best, I'll update this section

Bee Friendly -
(October) Floss silk tree - someday it will be the showcase of my front. Unfortunately is going to have just one bloom this year. The tree is about 10 feet tall, and I put it in on X-mas 2006. The tree usually doesn't bloom for a couple of years, so it was a big surprise that it bloomed, and a big tease that it has just one bloom. Some day it will look like this.
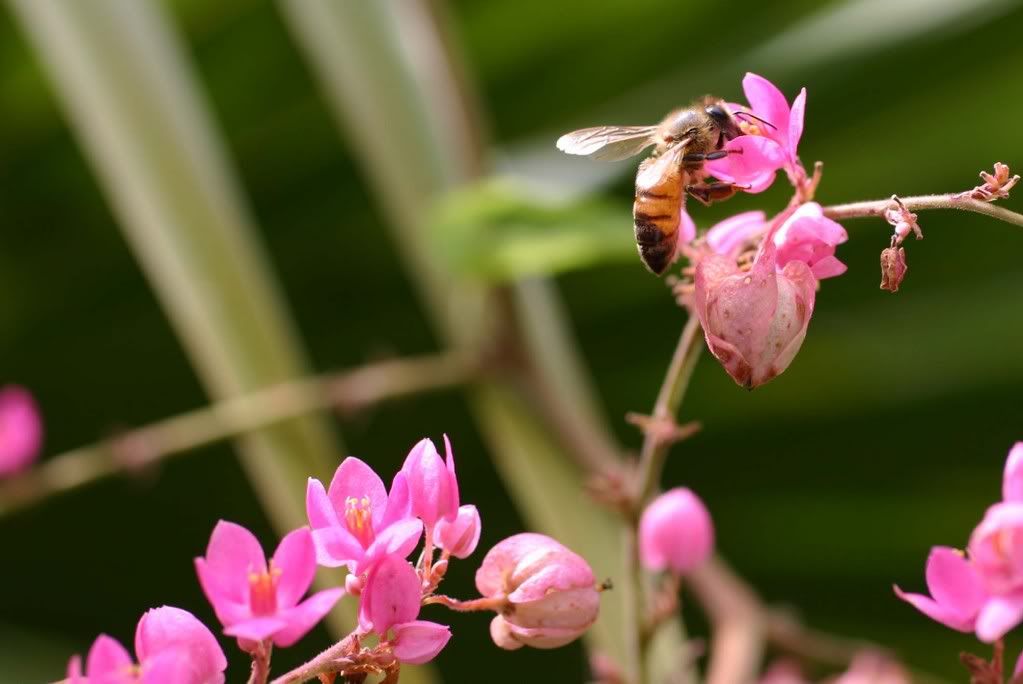
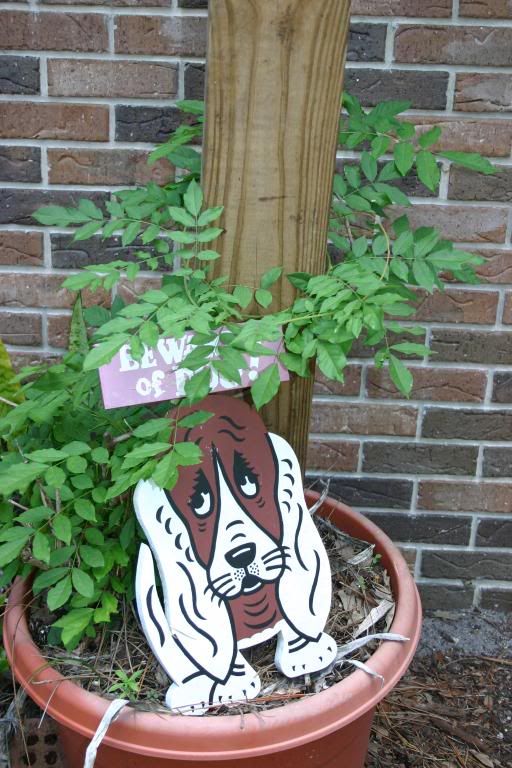
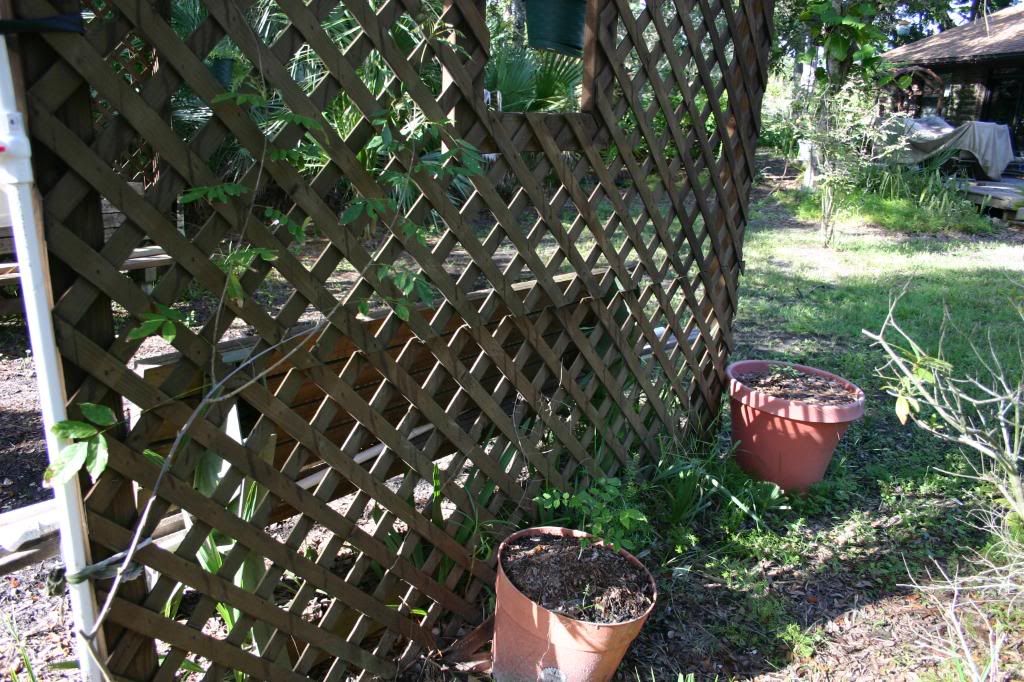
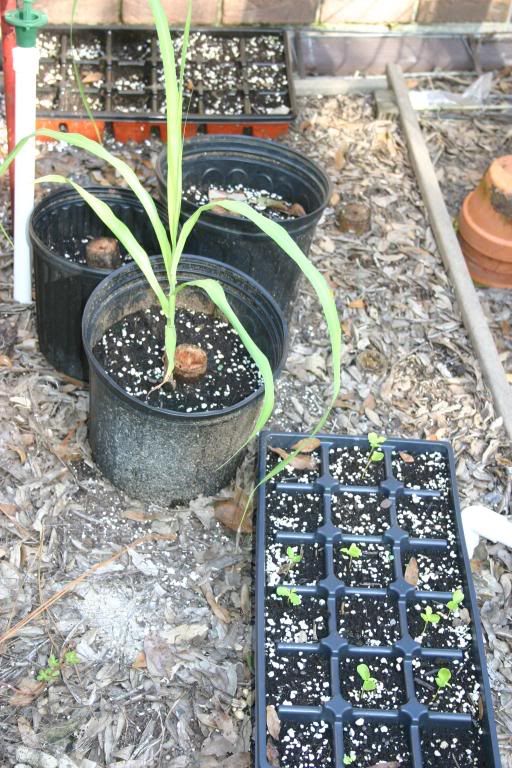
(August to Early November) Hyacinth bean- . Climbing Vine, large clumps of small colorful flowers. Popular with all pollinating insects in October. No insect would look at it in August. Small wild green bees were all over it in November. Attempting to propagate by waiting for seeds to develop from blooms. Pods and seeds may be poisonous due to high concentrations of cyanogenic glucosides, and can only be eaten after prolonged boiling.
Firebush - A good source of nectar. The bees interest seems to be limited to just when is the only source of Polen and Nectar. Flowers all year around, but bees take interest only during the months of October and early November

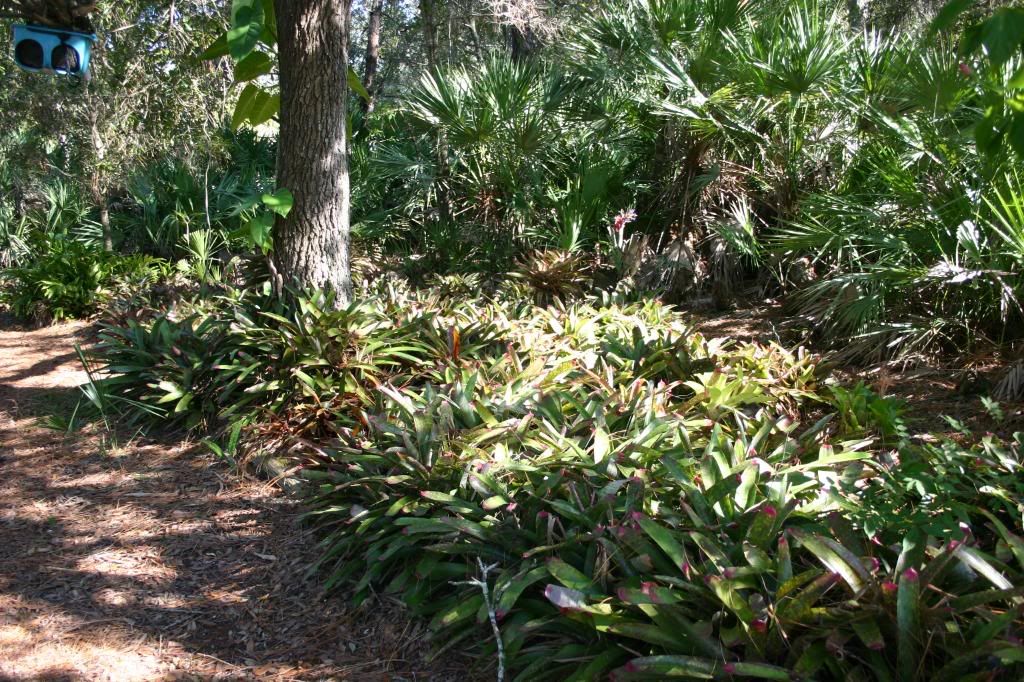
Saw Palmetto - It is a small palm, normally reaching a height of around 2-4 m. Its trunk is sprawling, and it grows in clumps or dense thickets in sandy coastal lands or as undergrowth in pine woods or hardwood hammocks (Wikipidia) Begins to bloom in Late March till early May

Magnolia trees - Magnolia is a large genus of about 210[1] flowering plant species in the subfamily Magnolioideae of the family Magnoliaceae. (wikipedia) I have three large tress that bloom in the summer begining in April. Beauty Berry - Begins blooming in May. Literature says is a good nectar source, but it is not a good pollen source

Black Berry and Blue Berry- Begins blooming in Late February till ?

Herbs - Basil, Cilantro, chives, Lemon balm, and many more. I try to plant batches of everything months apart that way there is something blooming all the time.

Confederate Jazmin- This one is wrapped around a 75 foot pine tree. Blooms early May,and when it blooms you can smell it the minute you step outside the house.

Bromeliads - Very popular Tropical plant. These are those very expensive plants you see with beautiful blooms in the stores. I have several varieties, that may flower at any time from spring to fall. I can't give them away fast enough. For every one I pull, two fill in the empty space.


Bromeliad in bloom (Puya raimondii)


Another Plant I completely ignored till now. (Picture) Wisteria - Paying more attention to it now. I have two vines that climbed a couple of pine trees some 30' high. Great bee plant, blooms spring to summer, but I have never seen mine like the ones in the Wikipedia link. Fertilizing it and talking to it nice in the hope it will bloom better. Is classified semi invasive by the state of Florida. So far this year I have given away 5 new shoots (about 1 to 3 feet tall). I kept and transplanted 5 plants, all of which are doing great.


Fruit trees - Six citrus trees (March bloom), Two Mango's (March Bloom), two Florida Grape vines (Wine grapes - most bitter grapes you can ever try ), Pineapple plants, and my latest addition ..... a young Japanese plum tree.

Other trees: Oaks (March Bloom), pines , Weeping Willow (January and February bloom), Palms, Silver Dollar eucalyptus, and Brazilian Pepper (September November bloom)

Bushes: Azaleas, and Hibiscu


Azaleas - Blooms late January. Buble bees show interest in the Azaleas, Honey bees don't touch it. Blooms around2nd week of February, for 2 to 3 weeks afte initial bloom.
-----------------------------------------------------------------------------------------------

Bee Unfriendly - White Ti ti (Cyrilla racemiflora L.), Seen pictures of this plant, but have never seen it in person. On the other hand, Yellow Jessamine (Gelsemium sempervirens. I had been training one of this plants (picture) up and over a trellis for 2 years now. Was never a big flowered, but the Florida Beekeepers forum guys suggested I should get rid of it. Very very poisonous. Three Wisteria plants are in its place now. (See picture above)


Around the yard - I like unique plants. Some I grown for their looks, others just to see if I can. Florida Soil is very sandy, so I prefer to grow or at least start out most of my plants in pots.
Tobacco (picture) - Smokers at work were complaining about how much the addiction was costing them. Made me wonder why smokers don't grow their own stuff. I did some online research, found an online seed supplier, and for $35 I got a book on how to process tobacco, and more seeds than I knew what to do. Is a beautiful plant, has nice blooms, and tons of seeds. I'm not a smoker, but it turns out tobacco makes a great natural bug insecticide. Also, a lot of the leaf eating bugs, prefer it over my tomatoes and herbs. Not sure if they get addicted or die from cancer, but as long as they stay off my stuff and on the Tobacco - I'll keep growing it. I been able to grow three harvests per year. I mostly use it to mulch, but some say is good to smoke the bees with it at least twice/year. Organic way to knock varroa mites off bees.

Sugar cane - Now how cool would it be if I could soak this in water, and make natural sugar water for the bees. I'm a long way from it. I got 1 stock from a friend, that technically I could had gotten five plants from, but only one of the stocks grew. Here it is, right next to my seedlings of Passion fruit plants for next year.
Frangipani Plant - The flowers from these plant are use to make Hawaiian Lais. Beautiful, very fragrant, but one of the most useless flowers when dealing with bees. Along with another one of my favorite plants., the Bouhgainvillea

Saturday, September 1, 2007

Happy Labor Day

Labor Day is sort of an ironic holiday if you are a bee working yourself to death. Still, to celebrate it, I figured I would give the hive a break and not inspect it this weekend. For my next inspection (week from today) my goals are to first, not wear my beekeeper gloves again (this time for the duration of the whole inspection); they are hot and hard to pick anything up with. I’m also hoping to have my new frame grippers in by then. The grippers should make the job of getting frames out of the hive, and holding them steady for the camera, much easier. Finally, my last goal is to pull and photograph every single frame in the hive. Nevertheless, not inspecting the hive shouldn’t keep me from observing it for normal behavior and my own educational purposes. Seven days ago I observed a frame about 80% full of new eggs, with a couple of groupings of hatched eggs. Knowing that and the fact that: Worker bees hatch after 3½ days, cap 9 days +-1, and emerge 20 days +-1 (Bush farm bee math), then on my next inspection I should be looking at a mostly capped, ready to emerge frame with most of the brood between 14 to 18 days old. Looking at the colony from the outside I’m deducting that things are good. There seems to be a good nectar/pollen flow going on currently where I live, and the bees are busy as bees (Go Figure). Notice in the following pictures not just the bees coming back with a full load, but the bees tracking in pollen on the landing board. Is also very obvious where they are taking it if you follow those dirty little feet. Right in the middle of the brood, where the frame I pulled out with eggs is located. The other path leads into frame 1. Since the bees have chosen to concentrate their labor on that outside frame, I figure is only appropriate this should be frame 1 from now on.


Surfing the forums in an attempt to learn how to change the current frames (fully drawn out) for some of my new never used frames, for now it seems like there is no easy fast method. The Florida Beekeepers forum is currently discussing the Small hive beetle (SHB). Seems like some beekeepers are experiencing some serious SHB activity, I think my set up has it under control. Still, I would like to get rid of the little opportunistic scavengers all together; some of the Florida beekeepers have made some very valid observations. I must agree with them: most keepers don’t find the SHB in its worm/maggot like stage inside the hive. The only time they are inside is if the colony is very weak, collapsing or after collapsing. The eggs must not have been laid in the hive, so where are they coming from? Several of them are currently experimenting with bait traps OUTSIDE the hive. We just had Chinese take out and I think that just provided me with the perfect containers to make my own traps.

How do bees end a hard days work ?? By cleaning the landing board and each other. I think I see very good grooming characteristics. Good grooming = no Mites

I'm sure there is a good technical term for it, but I call it mopping the landing board. Notice all the bees mopping away, the more they bring in during the day the more there is to clean in the afternoon. Notice the bees cleanign the landing board and the body of the hive. Sandwich in between the guards and the fannign bees regulating the temperature inside. On the left you can see the eqivalent of a bee smoke break. Two bees step out from the Hive, one grooms the other, and back in they go. (:34 secs into the video)

-"Hey sister, want to come outside and groom me" -"Let's go ........... Ok done, back inside to work" :-)


Powered by WebRing.
Powered by WebRing.