Sunday, April 19, 2009

Wax Melter

WARNING: Wear garden gloves or use heat pads. The Temperature inside the box will exceed 130F after an hour of sitting undisturbed in the sun. It’s hot enough to burn your finger tips if you touch the baking pan. Trust me, I know for a fact.
Key components:

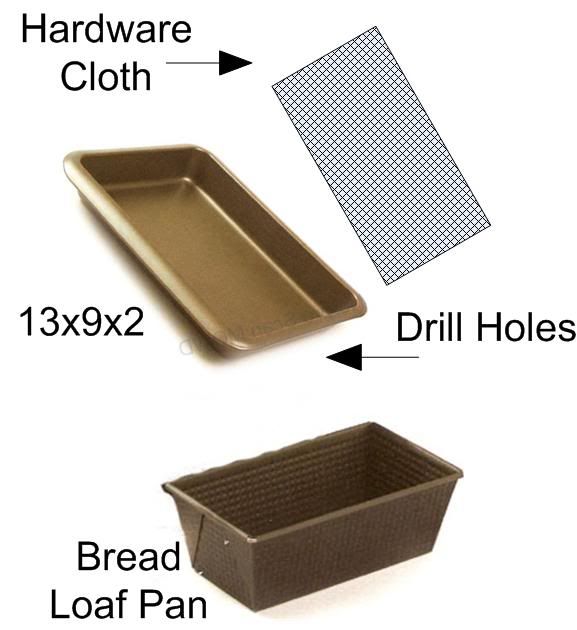
  • I chose a 13x9x2 baking pan to hold the wax to be melted $ 7.50
  • A bread loaf pan to catch the melted wax $4.50
  • Wood to build a box $6.00
  • 22x16 Pane of glass $6.50
  • Optional candy thermometer $2.50

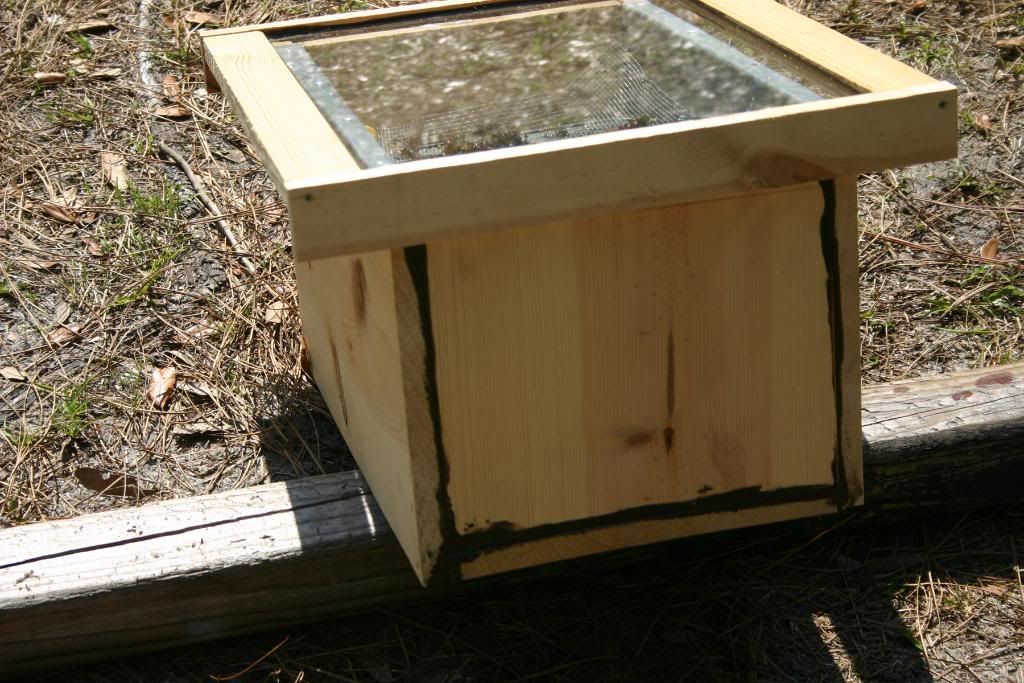
It is not a bad idea to take the new purchased pans into the kitchen and swap them for an older set. You will need to make a wooden box big enough to accommodate the pans; the larger pan must drip into the smaller pan. Then make a frame for the pane of glass and seal it all with some door and window caulking.


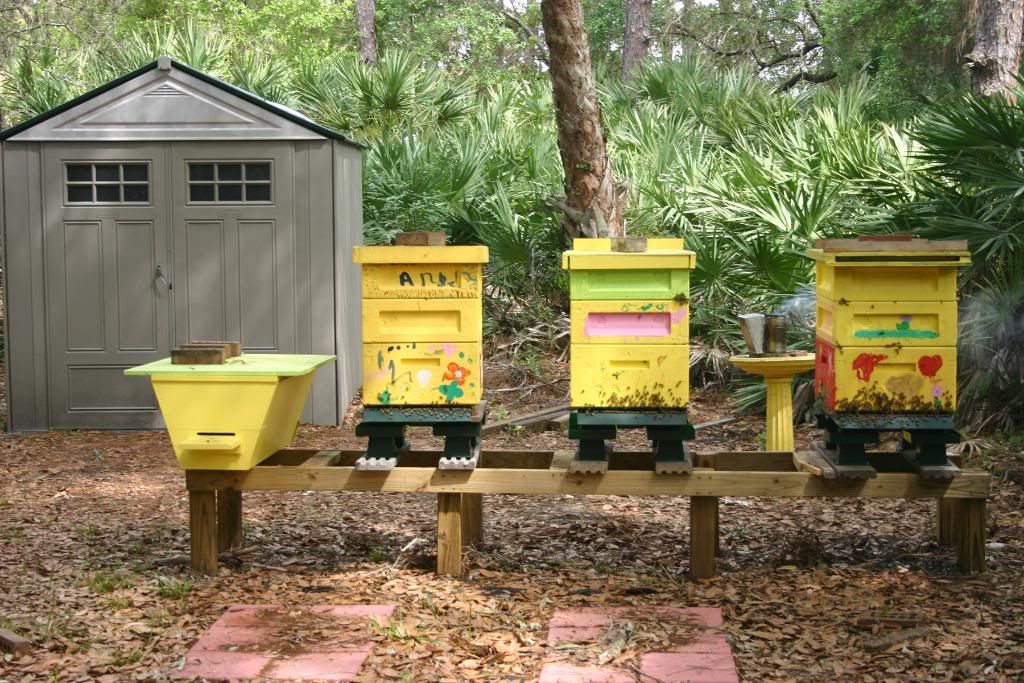
Here is the box sitting in the sun. The dark lines along the seams of the box are door and window calking.
I made a bed on my holding pan with hardware cloth to filter larger pieces of wire out of the starter strips and whatever else may be in the wax. It also holds the wax off the pan so that heat can reflect off it.
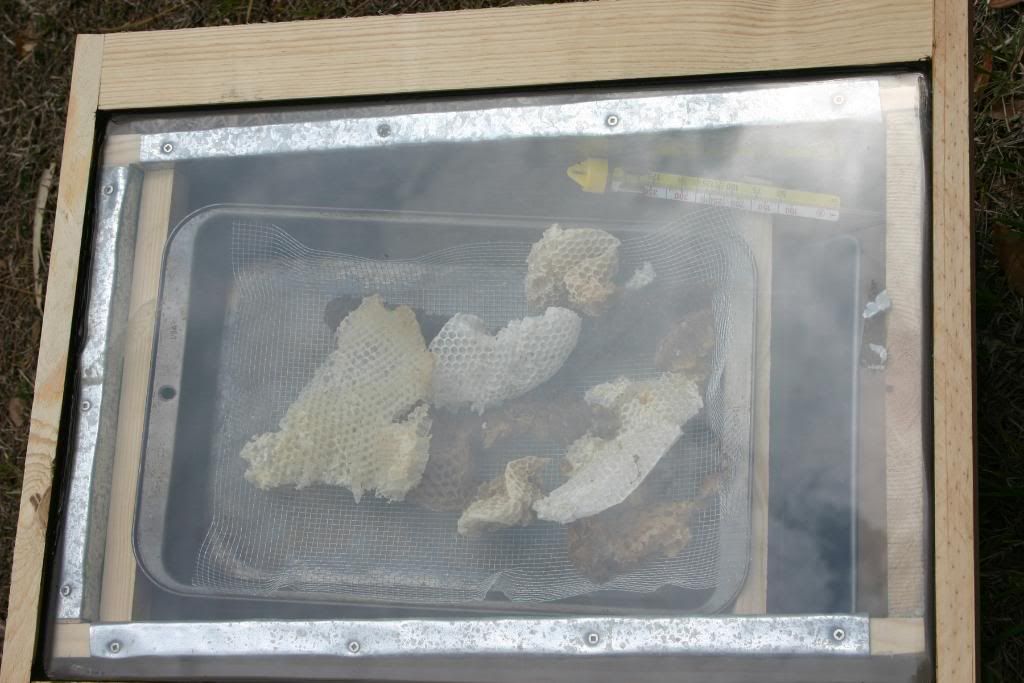
The old wax from brood frames is not a good wax to try and melt. It’s not only ugly but it never melts enough to flow out of the top pan. I had mixed wax from old brood frames that were replaced, and wax left from the crush and strain process obtained while robbing honey.

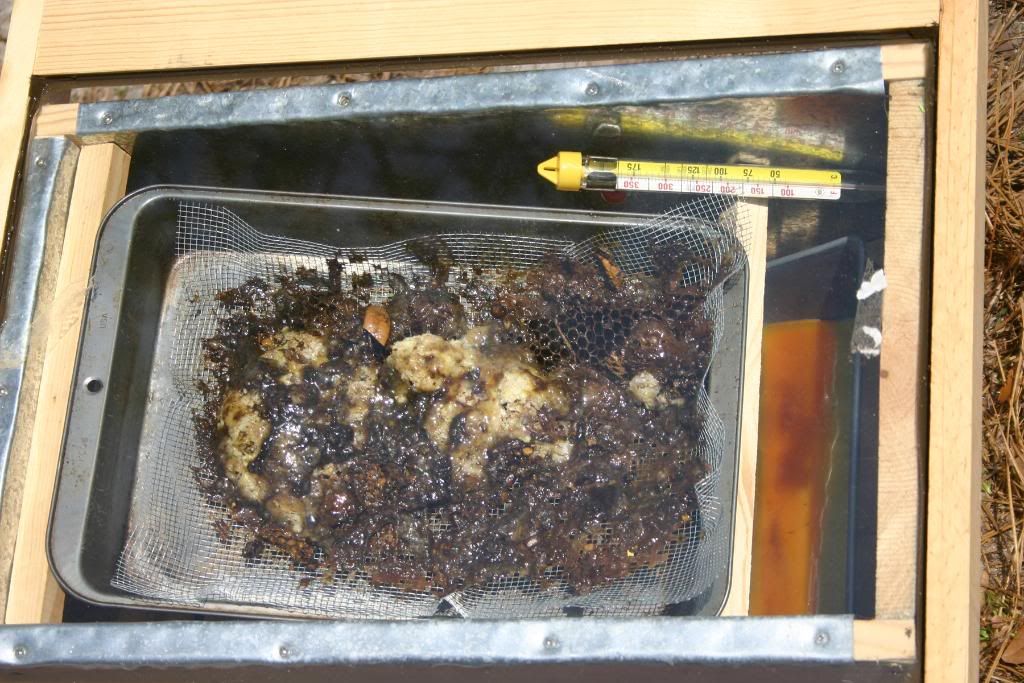
Below is the result of my 1st solar wax melter trial. The stalactites of wax were formed because the sun went down before the wax in the holding pan had dripped down.

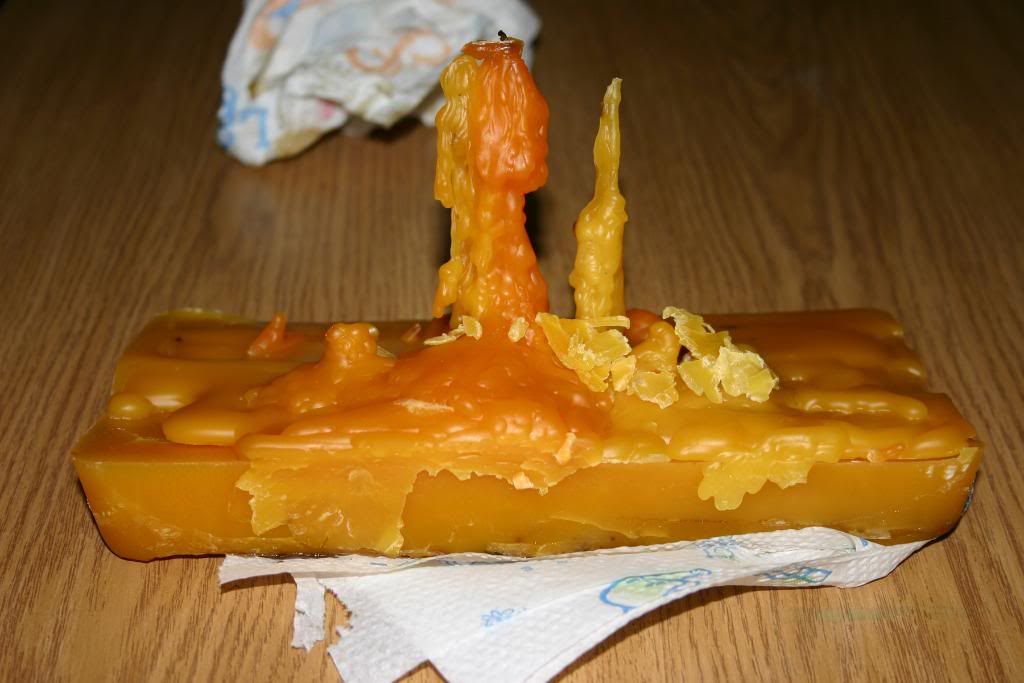
A few more hours the following day did the trick. Notice in the picture how one side of the wax is thicker than the other. The pan in the melter is not level. Allow the pan of wax to cool down over night. Once the loaf of wax is cool, place the pan and wax for five minute in the freezer. Remove and immediately twist the pan to remove the block of wax out of the pan.
This block of wax has really not been properly filtered out of impurities. Some people choose water in the collection pan. The wax sinks and the impurities float, therefore separating the two. Others use paper towels or coffee filters as a filter medium. I decided to use an old pair of panty hose. Below is my block of wax in the panty hose melting once again in the solar wax melter.

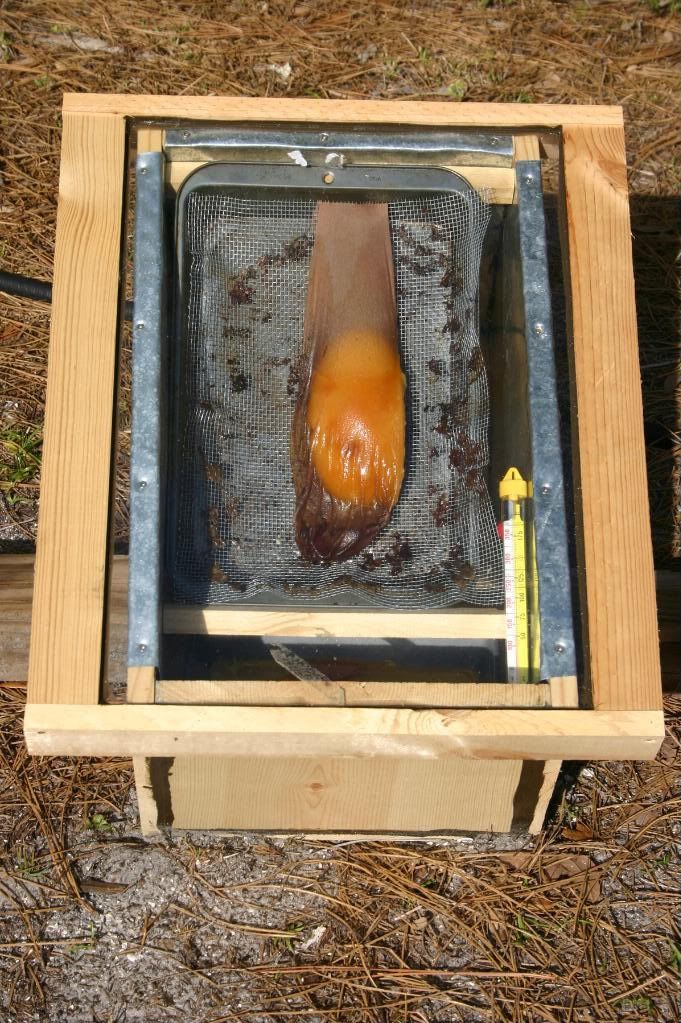
The weekend was clear, sunny and high of 82. The solar wax melter reached a temperature of 90 within 10 minutes, and within the hour the temperature inside the box had reached 130 Fahrenheit. That was hot enough for the wax to begin flowing down
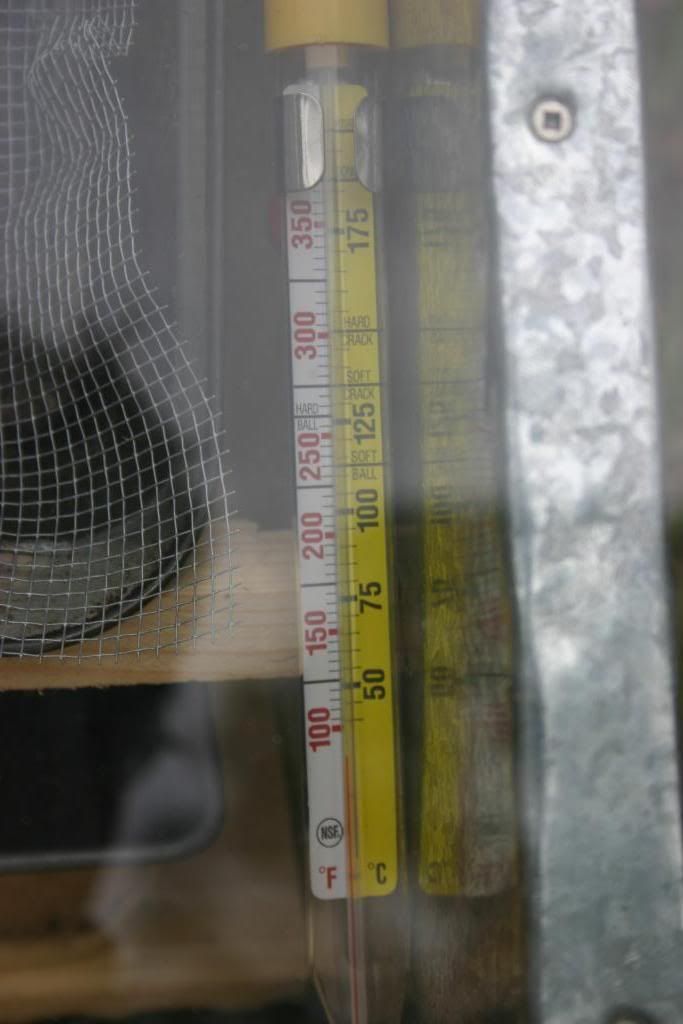
Time for candles?

Saturday, April 11, 2009

It has been three consecutive weeks of inspecting hives. The first week was a search for the old queens, killing them, and then introducing new ones. The following week I opened them to remove the queen cages, at which point, I decided it would be a good idea to leave them alone for a few weeks. After speaking with Mike and reading his blog I decided maybe it would be a good idea to see if my new queens were laying eggs or had been replaced like his. Just in case things were fine, I decided that it would be a good time to super the last two hives. Here are my last two supers, one has wooden frames with starter strip, and the second has hollowed out plastic frames.
With all the practice I’m getting good at planning and carrying out the inspections. Below is a picture of the back of the hives, my saw horses with a board to close the bottom of the super when it’s place on top of it, and a sheet of plexy glass to close the top of the super. I don’t have to deal with all the bees in whatever box is placed here. On the floor are my two new supers (and last) for the two hives on the left. I like to light my smoker (hanging on the left hive) and smoke the hive that is to be inspected and then wait a minute or two. While I’m waiting I arrange all my tools and aids to make sure I have everything I could possibly use. After the wait, I give the 1st hive another puff of smoke and I also smoke the next hive to be inspected.

I began the day by inspecting the middle hive (The Eager colony). I took the super off, placed it on my saw horses and closed it up. I removed one of the outer frames to create more room to inspect the other frames. My main goal today was to look for brood in the middle frames. Below is the outer most frame; the hollowed out plastics frames look great. The bees build whatever size they desire and things are a little more natural.
After removing the outer frame and sliding a few frames out, I pulled one of the middle brood frames. No queen cells and some uncapped brood. Uncapped brood means the egg in that particular cell was laid 4 to 8 days ago. Since the new queen was installed over 14 days ago, the uncapped cells are from the new queen, and since this frame had no eggs the day I killed the old queen….All this is work of the new queen.
Below is the flip side of the frame above. A lot more uncapped brood can be seen towards the right on this side of the frame. That was enough to convince me, the new queen was accepted.
Now I placed the super back on and took a quick look at the future honey crop. Below is one of the outside frames. It is not fully drawn out yet and has very little honey in it.
Below is another medium frame from the same super. This one is pretty much fully drawn out, has tons of uncapped honey, and a few capped drone cells.
And finally a frame full of uncapped honey. How can you tell it is full of honey? Well, aside from zooming in and seeing the syrup in the frames, notice the color difference of the wax between this frame and the pure white color of clean empty cells.
This hive was definitely ready for a new super.
Next I moved over to inspect my Angry hive. These ladies are going to drive me nuts the way they draw out comb. It is like there are two comb building groups that usually begin working at opposite ends of a frame, and by the time they meet in the middle they are always off center. I began inspecting on the super with this one. Below is a super frame, and notice towards the left how that side comes out allowing the right side to slide behind it.
Here is one of the outside frames from the deep brood box. Notice how the comb has the same overlapping problem as the super frame above. Also, as in the previous hive, the outside frames have drone cells.
Here is one of the brood frames, the main reason for opening the hives. There is tons of capped brood with a few un-hatched eggs and brood under four days old. There is more on the opposite side but I forgot to photograph it.

I left my original hive alone today; I’ll look in it next week. I feel better after observing that everything is normal and no one seems to be planning or preparing to swarm. Here is my Apiary today. All the hives have two supers now; my TBH on the left still sits empty waiting for the 3lb package due early May. My smoker is on the background cooling off sitting on top of the bird bath.
It was a good inspection day and I need to begin preparing/planning to rob, extract, and process honey. I did have on issue today. I began my inspections wearing my mechanic gloves. I was hoping for equal protection and better handling. I was wrong on the protection part. I need to up the sting count by one, I got it good on my right hand.

Sunday, April 5, 2009

Let Nature Do Its Thing

This weekend was my first inspection since I requeened ten days ago. The offspring’s of the new queens will be emerging in about 20 days, that assumes it took 3 or 4 days to release her from the cage and maybe an additional day for them to begin to laying eggs. It would be a safe bet to assume the hives attitude change should begin in about a month, and a total of 2 to 2 ½ months for all the bees in the hives to be offspring’s of the new queens.
I began my inspection with the weak NUC, sad to say, it was too weak and it didn’t make it. The traffic in and out of it was from all the bees robbing it of its resources.
I moved on to “Old Faithfull”. The picture below is of the top of the second super. The nine frames of this supper will most likely be ready to rob in 2 weeks.

The new queen was released and it moved right into the deep box. I found a small problem with the TBH bars I placed as a replacement of the two frames I removed to make room for the queen’s cage. The bees began working the comb from the bottom up, instead of working from the top down. The two TBH frames I had hoped to be drawn out were not touched at all. Instead I had to remove large pieces of cells from the bottom to make room for reinserting the frames. Weird, I though bees worked comb from the top down. The word disappointment doesn’t describe how I felt when I though none of the TBH (top bar hive) frames were worked on. I though it was a solid idea.I moved to the next hive, the Eager colony. The queen was released and to my surprise these ladies did work on my TBH bar that I left in here. Pictures below are worth a thousand words. I placed the queen’s cage (face down) over the top of the frames of the deep body.


I put the super back on minus one frame. The frame that would have sat on top of the cage and would have been pushed out. In its place I took one of my TBH bars so that today I would get a drawn out frame for the package being installed in the TBH (Early May)
Here is the adjacent frame in the super. It is a great picture to learn the differences between capped honey and capped brood. The capped honey is light in color and flat across the surface. Capped brood is darker and the individual cell caps are distinguishable from one to the other. To the left are also hatch eggs about 4 to 6 days old. They are probably the first eggs laid by the new queen before moving down to the deep body.

How can I tell the queen moved down? Simple, the frame above shows it being backfilled with honey. The workers have filled the cells below the capped brood with honey, and since the flip side is full (picture below) along with all the adjacent frames, there is no other place to lay but below in the deep. This super will probably be ready to rob in 20 days.
Finally time for my mean hive, I decided to leave them for last, since more bees from this hive will follow me through out the inspection of all the hives. When you inspect a hive a couple of mad bees from the first will be buzzing you as you inspect the adjacent hive. During the inspection of the second hive some mad bees will join the mad bees from the first hive, and by the time I’m done with the third hive I have quite the following going. Now I’m talking about 4 bees from each hive, tops.
So I open my Mean hive in which I put two TBH bars, and to my delight two drawn out TBH bars came out with the top.

I left all the drawn out frames (3) out on the yard to be cleaned. I don’t want to put cells with honey into the TBH to attract other critters before I install a package.

Now, unlike the super frames from previous hive (see nice super frame above) the bees in this hive don’t seem to like my starter strip too much. They drew out my TBH bar nicely, but the adjacent frame was completely off.

I did some minor trimming in an attempt to correct things, and gently shook the bees off the TBH bars in top of the hive. They very nicely just walked right in. OK, who are these nice bees and what have they done with my mean hive???


Powered by WebRing.
Powered by WebRing.